

This article will explain the process on mapping a network drive on macOS computers.
Supported Devices
NAS326
NAS520
NAS540
NAS542
Prerequisites
NAS user credentials – Make sure you have created the user credentials on the storage device.
NAS IP Address – It is recommended to program a static/manual IP address on the storage device.
NAS Shares – User account should have access to necessary shares on the storage unit.
Basic knowledge of macOS.
Connecting to NAS
To connect the macOS computer to the storage device do the following.
- From the "Finder" click on the Go menu option.
- Select Connect to Server or click
 + K on the keyboard.
 - Type in the protocol you wish to use to connect to the NAS plus the IP address/hostname.
- AFP – Apple Filing Protocol is the native file and printer sharing protocol for macOS.
- SMB – Server Message Block is the native Windows network file sharing protocol.
- On the server address bar type afp://server_ip or smb://server_ip, macOS supports both protocols.
Note: For security and performance concerns, AFP is the recommended protocol to establish the connection between NAS and macOS.
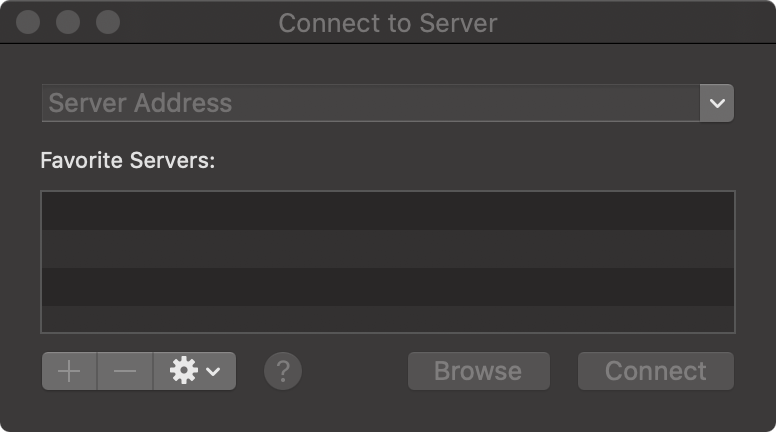
e.g.: afp://10.100.100.194 - Click the Connect button or hit the return key on the keyboard.
- Enter the user credentials and check the box to "Remember this password in my keychain".
Note: Keychain use must be enabled and configured on the macOS system.
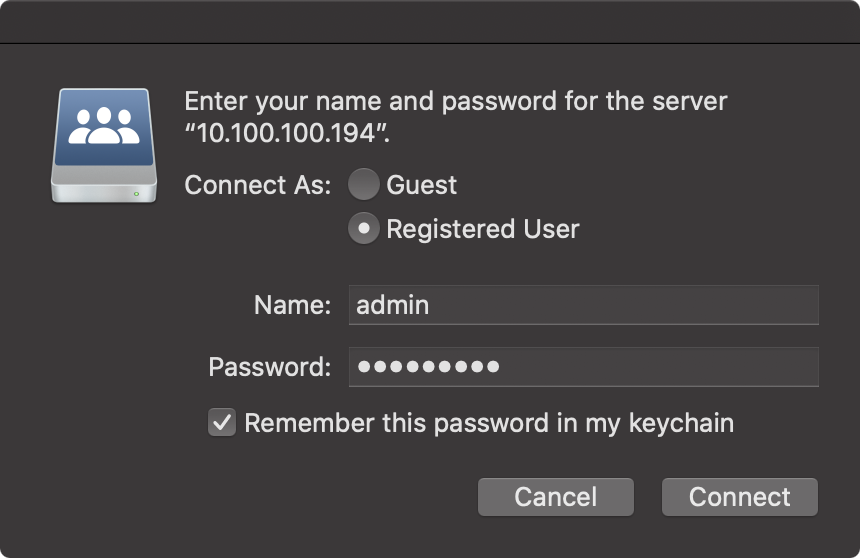
- Click the Connect button or hit the return key on the keyboard.
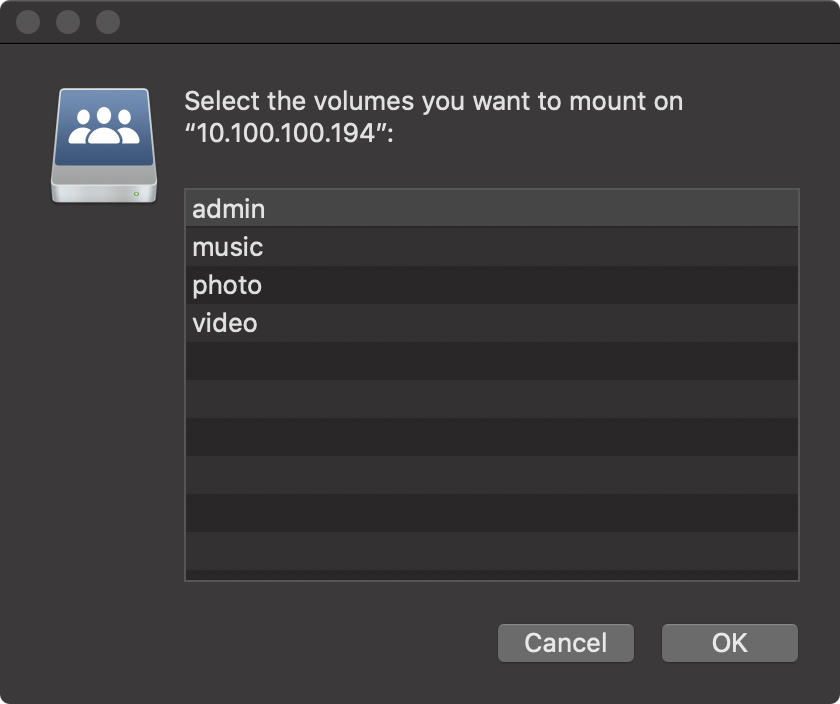
- Select the share you wish to mount (map).
Auto Mount (Map) on Startup
To automatically mount the share every time the computer is rebooted, do the following.
Prerequisite: Share has to be mounted before continuing. Follow the instructions on the section above to mount the drive for the first time.
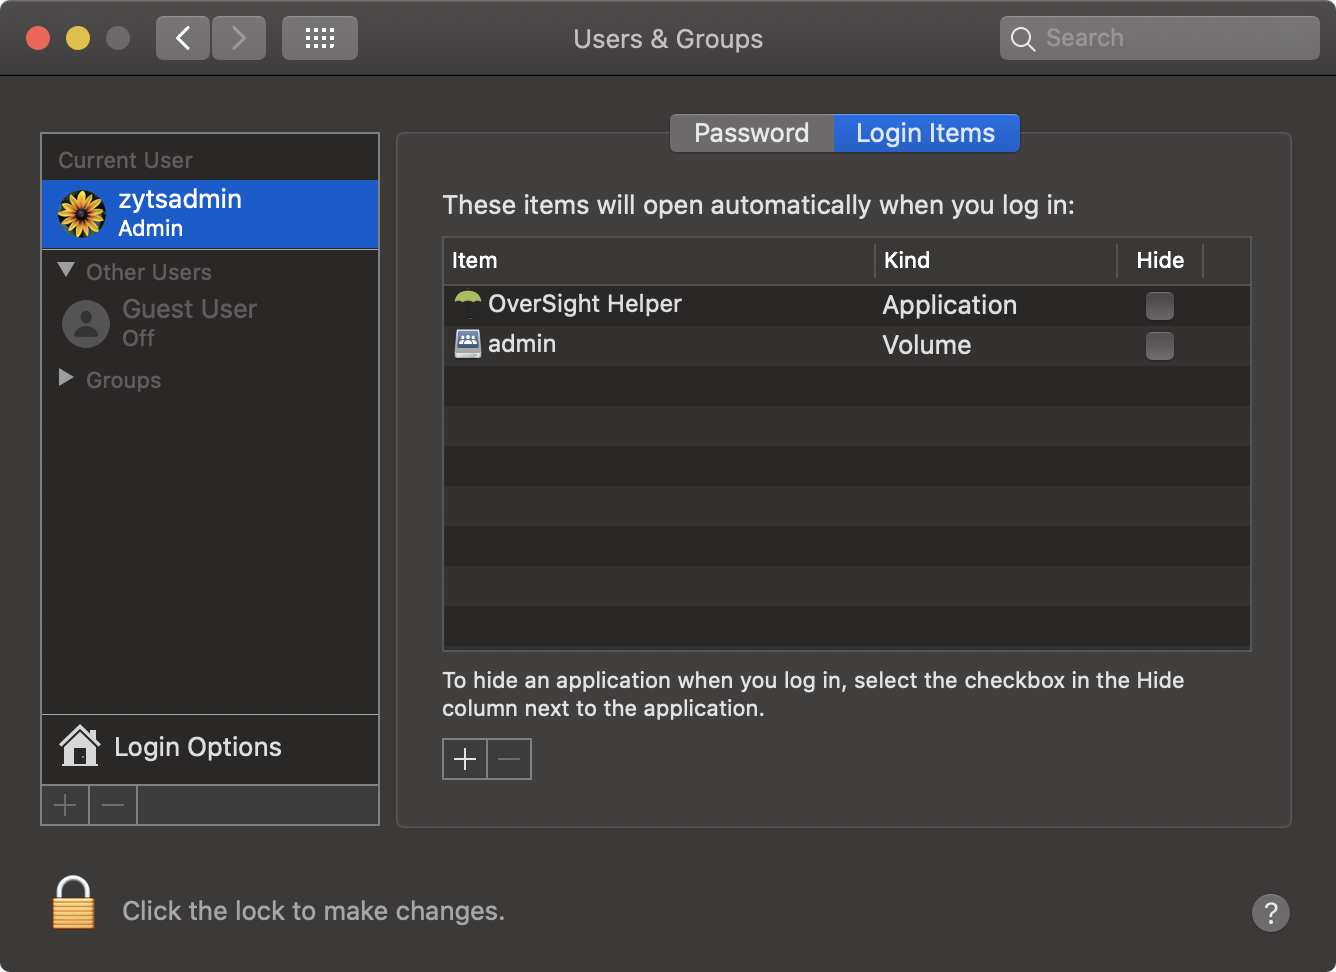
- Open the System Preferences and go to Users & Groups.
- Select the user account and click the Login Items tab.
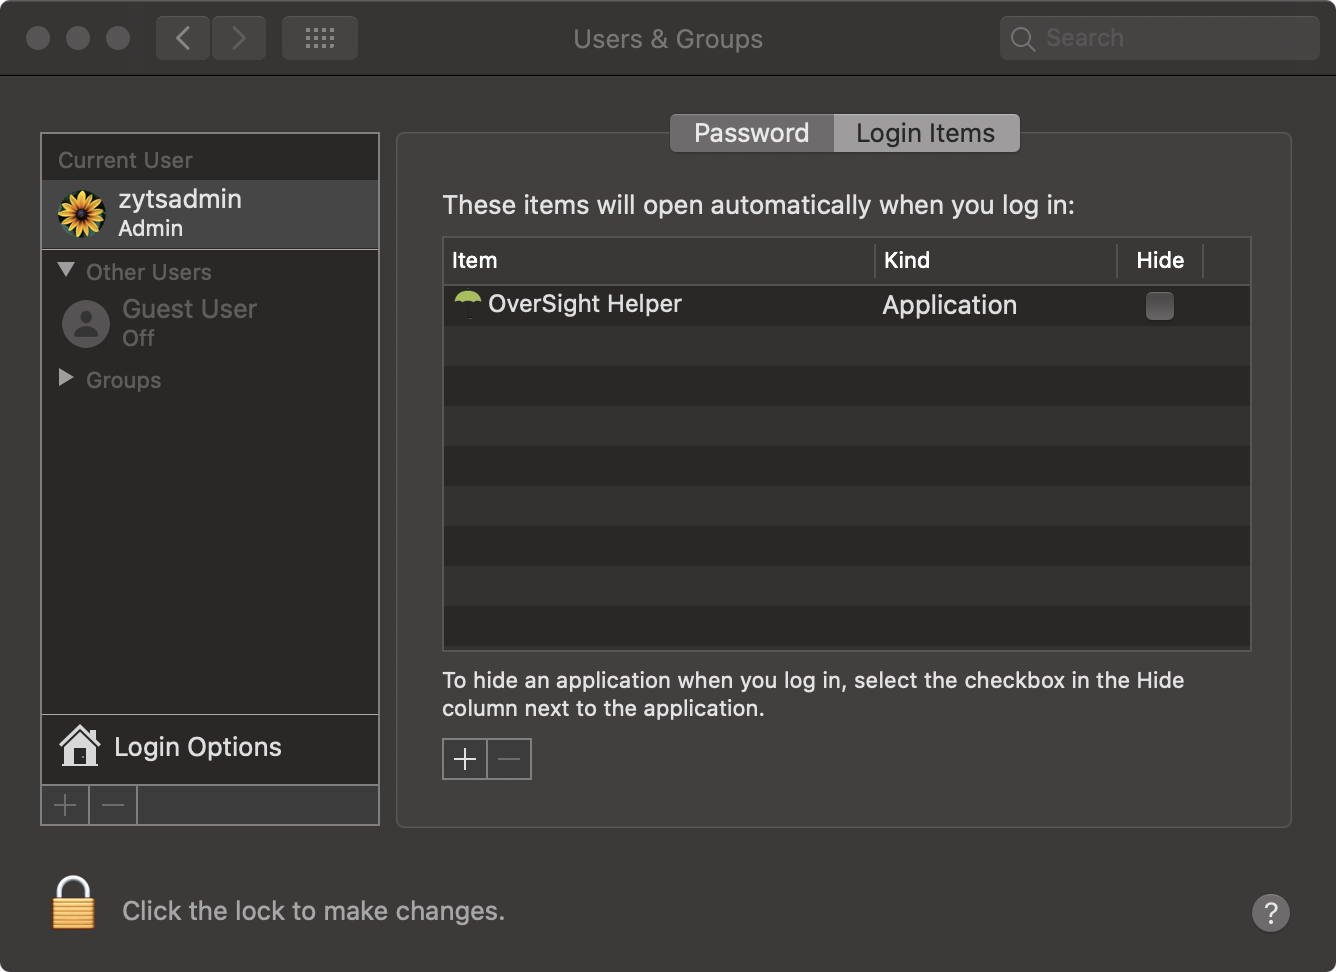
- Click the
 sign at the bottom of the Login Items list.
 - On the Finder window select the mounted device and share you wish to auto mount (map).
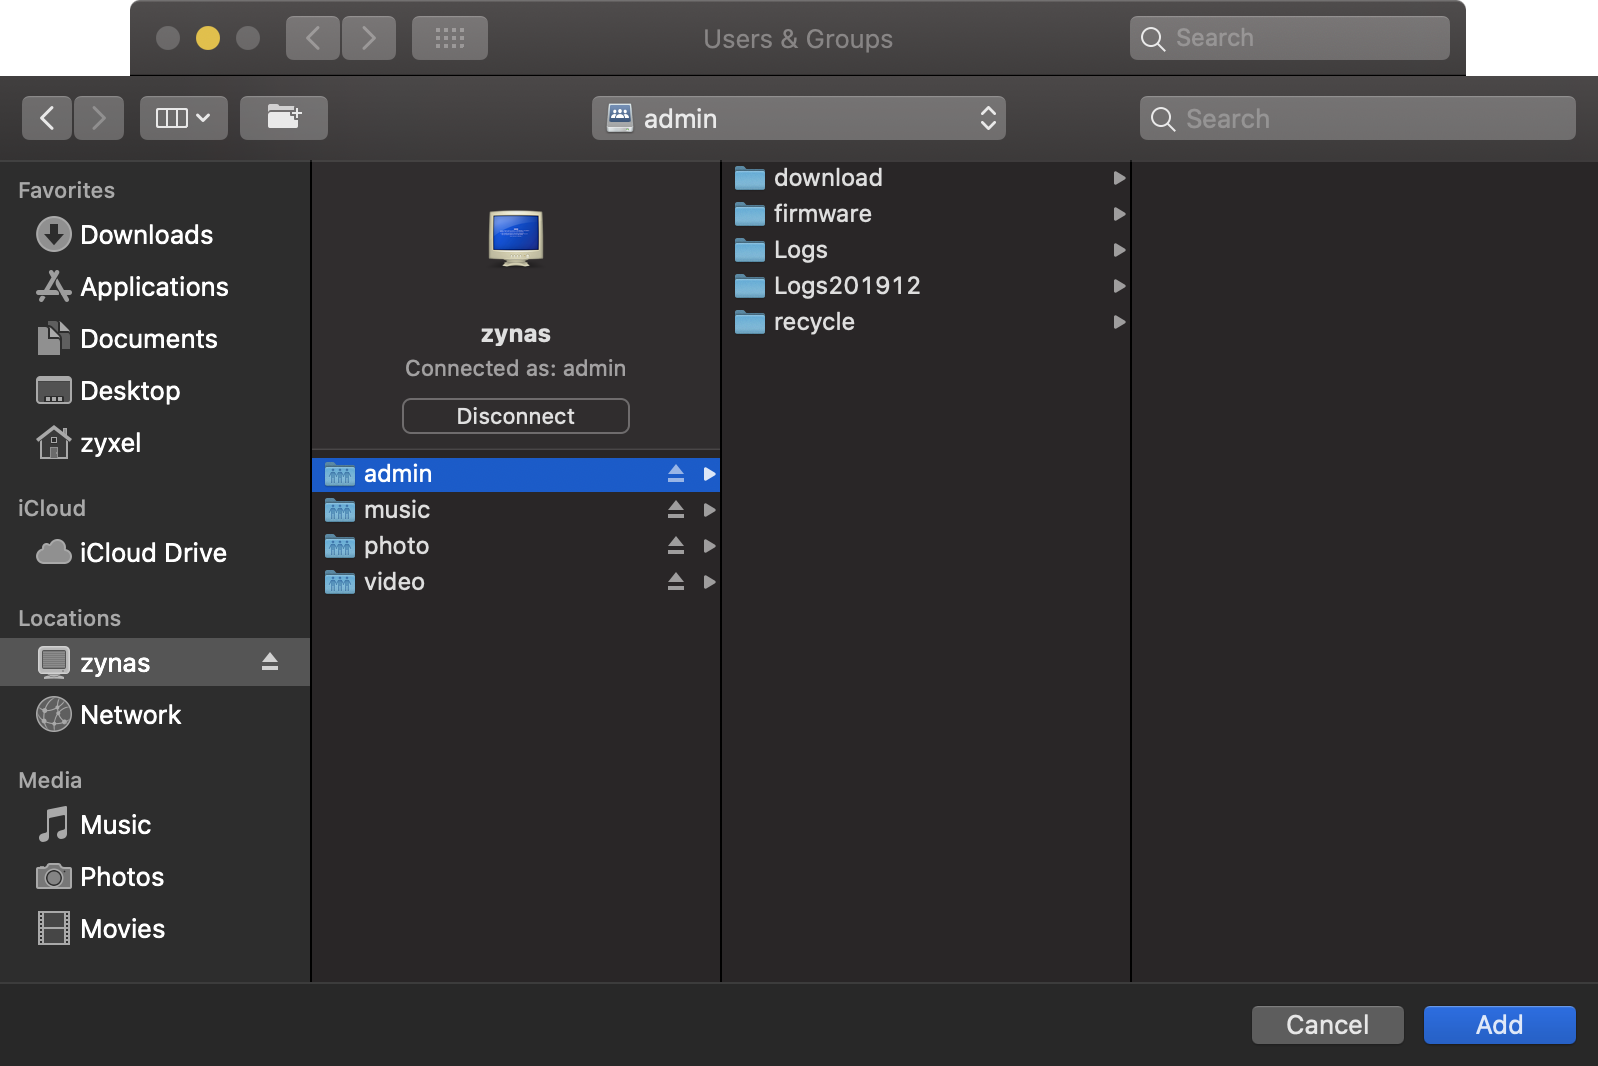
- Once you have selected a share, click the Add button.
- This will add the share to the user login items so that if the computer is rebooted, the share is mounted automatically.
- Repeat the process to add additional shares.
Disconnect NAS from macOS
To disconnect the macOS system from the NAS device open a Finder window and click the  button to remove the connection.

Comments
0 comments
Please sign in to leave a comment.