
This article will explain the process on mapping a network drive on your Windows computer.
Supported Devices
NAS326NAS520
NAS540
NAS542
Windows Setup
There are two ways that we will cover to map a network drive. The first method will be using the graphical interface (GUI) to map a drive on the NAS. The second method will be to use the command line interface to map the drive.
GUI Method
We will be using File Explorer on Windows to map the network drive. Follow the steps below to get File Explorer open and map the drive:
- Press the Windows logo key
 + E.
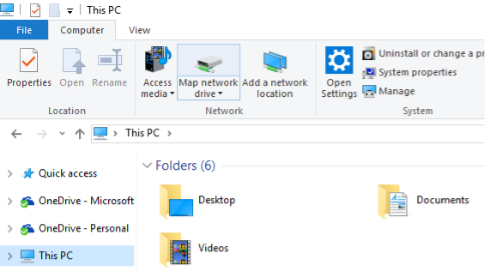
+ E. - Select "This PC" from the left pane. Then, on the Computer tab, select Map network drive.
- Select a drive letter.
- In the "Folder" box, type the path of the folder or computer, or select Browse to find the folder or computer. To connect every time, you log in to your PC, select the "Reconnect at sign-in" check box. ex: typing "\\<NAS_IP_or_Hostname>\admin" will map the admin folder located on the NAS)

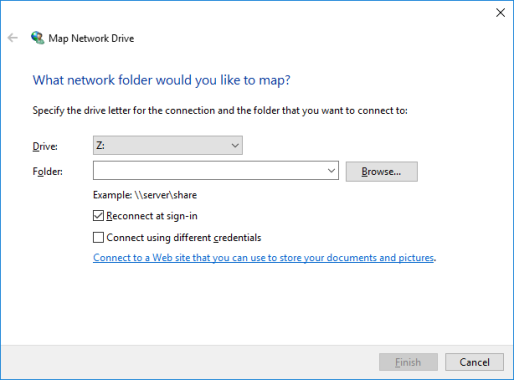
- Select Finish.
- Provide user credential.
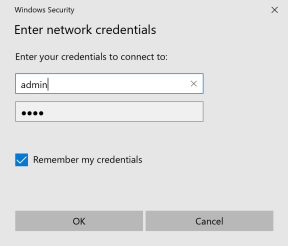
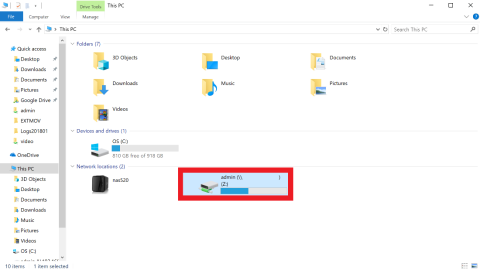
- Select OK. If the provided credentials are correct the drive will be mounted.
Command Line Method
To map a drive using the command line, please open a "Command Prompt" or "PowerShell" window.
Command Prompt commands:
- View list of network drives
net use - View list of current drives
wmic logicaldisk get name
or
wmic logicaldisk get caption - Command to map a drive
net use <Drive_Letter>: \\<NAS_IP_or_Hostname>\<share> <password> /user:<user> /persistent:<yes|no>
Example: "net use z: \\nas.local\admin mypassword /user:admin /persistent:yes"
PowerShell Commands:
- View list of network drives
net use - View list of current drives
get-psdrive -psprovider filesystem - Command to map a drive
net use <Drive_Letter>: \\<NAS_IP_or_Hostname>\<share> <password> /user:<user> /persistent:<yes|no>
Example: "net use z: \\nas.local\admin mypassword /user:admin /persistent:yes"
Comments
0 comments
Please sign in to leave a comment.