The following instructions are based on 5.11 firmware version for NAS appliances.
Overview
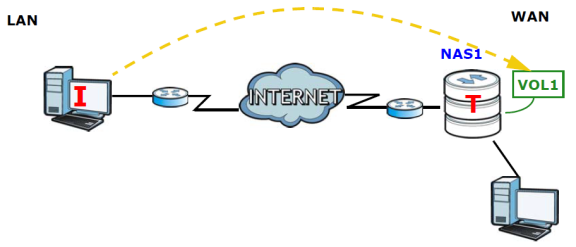
The NAS supports the iSCSI (Internet Small Computer System Interface) standard and can serve as an iSCSI target. When the iSCSI initiator is successfully connected to an iSCSI target over an IP network, data transmissions and storage management can be processed through the network. In other words, you can access and manage the target the same way as a locally attached drive.
Supported Devices
NAS326
NAS520
NAS540
NAS542
Hardware Setup
- Unpack the storage appliance and accessories
- Screw the provided HDD (hard drive disk) rails onto your hard drives
- Open the front face plate on the NAS and insert your HDD’s (hard drive disks), if only inserting one disk please make sure it is inserted into SLOT 1
- Connect an Ethernet cable from the NAS (back panel) to your network router or switch
- Connect the supplied power adapter to the back panel on the NAS
- Power ON the NAS by pressing the power button on the front panel (allow about 3 min for a full boot up)
NAS Discovery
Please install the latest version of the NAS Utility on your Windows or Mac OS powered computer. You can download the latest client software version from out FTP site, ftp://ftp.us.zyxel.com/NAS540/software/. Once the NAS utility has been installed please open the utility to detect the NAS device on your network.
NAS Seeker Utility:
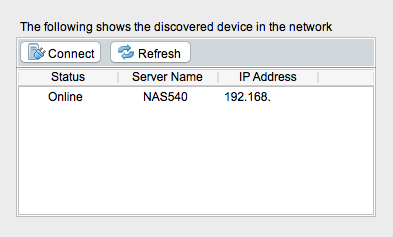
Select the NAS you wish to setup from the utility list to reveal the device information. The NAS Utility will display the IP address your router assigned to the NAS on the network as well as current firmware version installed on the device. Make sure the NAS is running latest firmware patch, you can download the firmware from the FTP site (ftp://ftp.us.zyxel.com/). If your NAS is running the latest firmware release please continue with setup, otherwise scroll down to the Troubleshooting and Tips section for instructions on upgrading firmware on the NAS.
NAS Info window:
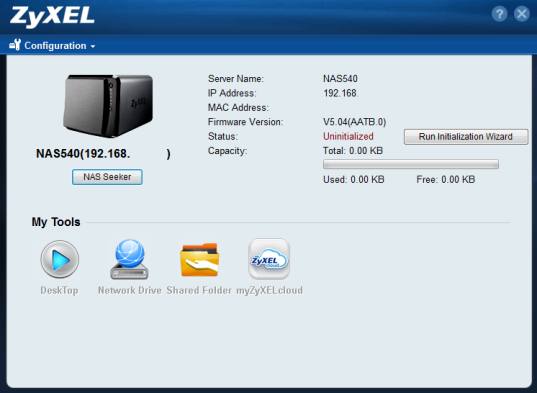
Click the "Run Initialization Wizard" button to redirect to the NAS web configuration screen, or, open an internet browser (Internet Explorer, Mozilla Firefox, Safari, Google Chrome, etc.) and type the NAS IP address on the address bar to access the web configuration screen.
Web Configuration Screen
When prompted for user credentials, type in admin for the "User Name" and 1234 for the "Password". Click the Arrow button to enter the WebGUI.
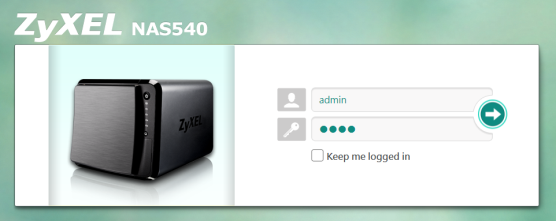
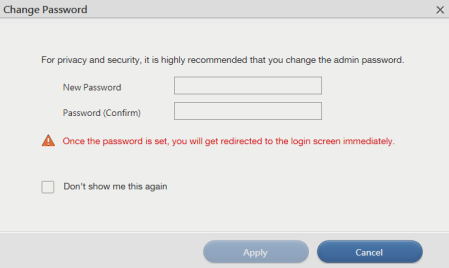
The following screen will prompt to update the administrator password. Enter a new administrative password and click the "Apply" button to save the change.
Click "Cancel" to keep the default password (1234) and continue with the setup.
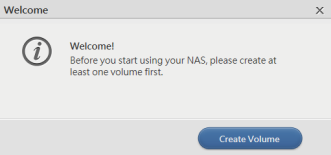
A "Welcome" pop-up window will appear the first time accessing the web configuration screen to assist with the creation of a volume. Click the "Create Volume" button to prepare the hard drives for use.
The volume setup wizard will open to assist in the volume creation process. For this example we will be creating ONE volume (Create single volume on RAID is selected), click the "Next" button.

Select Disk(s) and RAID type:
- Select disks – select the disks that will be part of the volume (for simple setup all disks should be selected)
- Choose a RAID Type – select the RAID type to use:
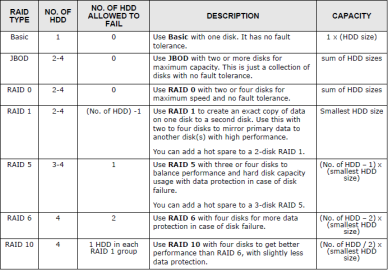
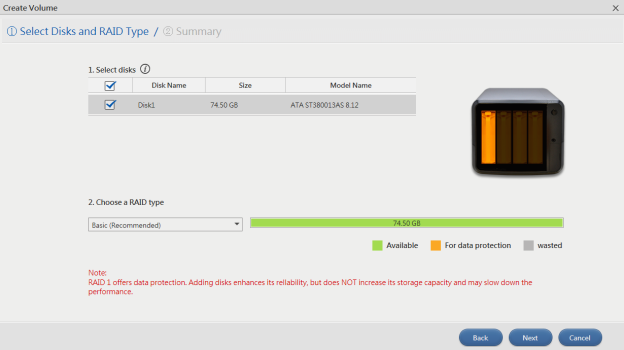
Click the "Next" button to continue with the volume setup.
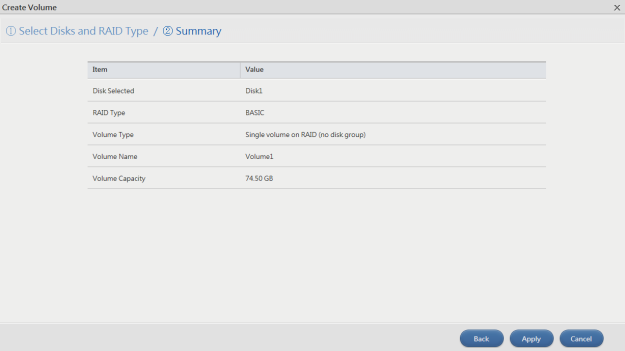
The following screen will provide a summary of the volume setup, click the "Apply" button to finalize the wizard setup and begin formatting the hard drive(s).
Create iSCSI LUN Volume
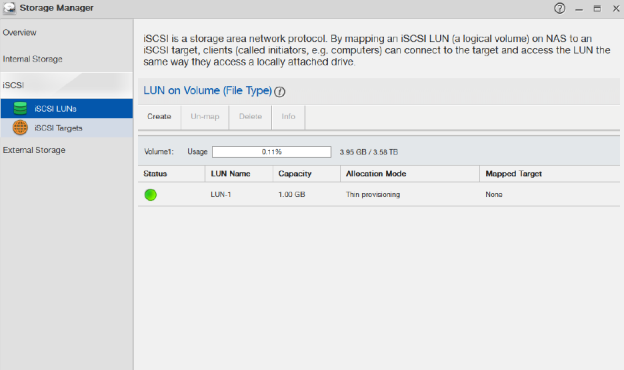
The iSCSI LUN volume needs to be created to specify how much storage you wish to set aside for the iSCSI target share. To create an iSCSI logical unit number (LUN) please login to the NAS device dashboard page and click on the "Storage Manager" panel icon. From the Storage Manager panel click on the iSCSI menu option on the left to reveal the iSCSI LUN and Target selections. Click on "iSCSI LUNs" to create an iSCSI volume.
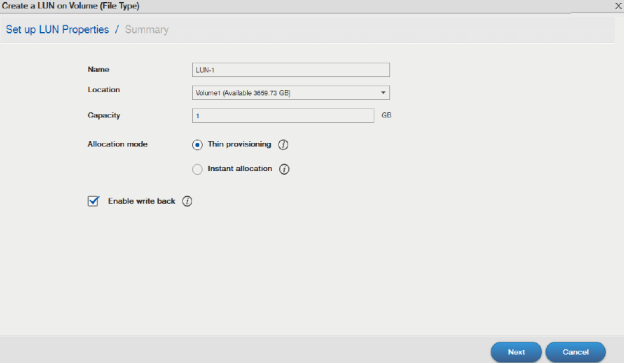
When creating the LUN volume:
- Name – Name the LUN share. By default it will be named LUN-1, you can change this if you wish.
- Location – Select the hard drive volume array you wish to create the LUN share on (if multiple HDD arrays have been created).
- Capacity – Specify how much storage to assign the iSCSI share.
- Other settings can be left on their default setup.
- Click "Next" to summarize the setup.
- Click "Apply" to finish creating the iSCSI volume.
Create iSCSI Target
With the LUN volume created we can now create the Target the iSCSI Initiator client will use to establish the link to the NAS iSCSI volume. Click on the iSCSI Target option on the left to create a Target for the LUN share that was just created.
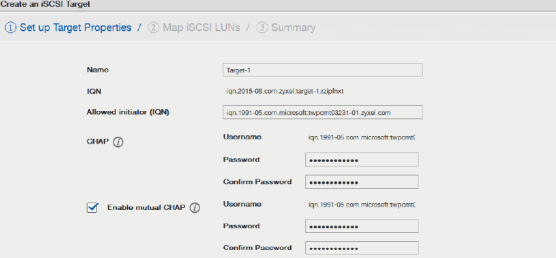
To setup the iSCSI Target:
- Name – Provide a name for the iSCSI Target. By default it is named Target-1.
- IQN – This is the NAS iSCSI Qualified Name, it cannot be changed.
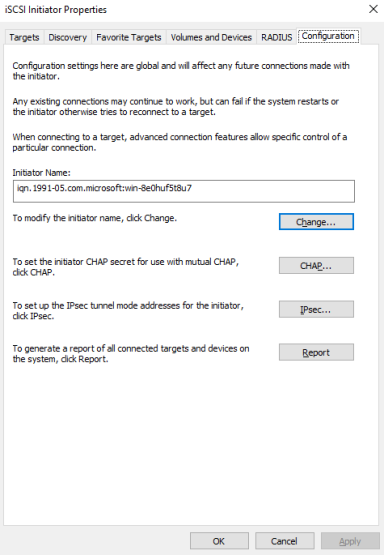
- Allowed initiator (IQN) – Enter the iSCSI Initiator client qualified name in this field. You can verify the Initiator Name by opening the client software (on computer) and clicking on the Configuration tab.
- CHAP – Setup a CHAP key (12-16 character length).
- Enable mutual CHAP – This is optional, it does not need to be enabled.
- Click "Next" to continue the iSCSI Target setup process.
- Select the LUN share(s) you wish to attach to the iSCSI Target.
- Click "Next" to continue the setup process.
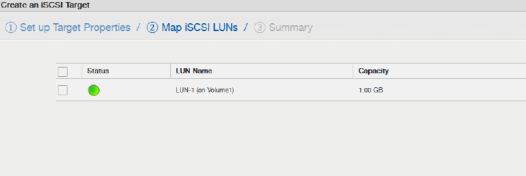
- Summarize the setup the click "Apply" to finish creating the iSCSI Target.
NAS iSCSI LUN-1 Info
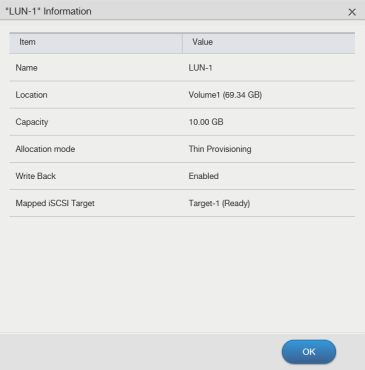
NAS iSCSI Target-1 Info

iSCSI Initiator Client Setup
The following setup instructions are based on Microsoft’s iSCSI Initiator.
- Open iSCSI Initiator on PC and verify "Allowed initiator (IQN)" in the "Configuration" tab.
- On the iSCSI Initiator click the "Targets" tab and type the IP address or IQN for the Target iSCSI vol.
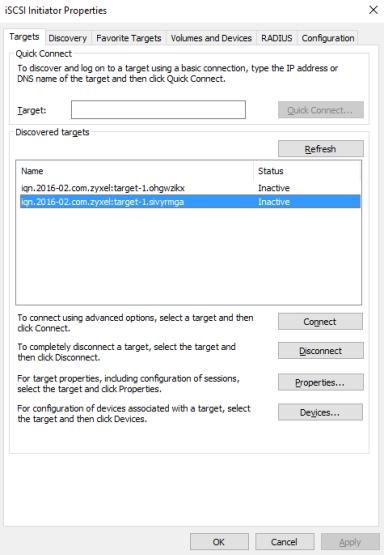
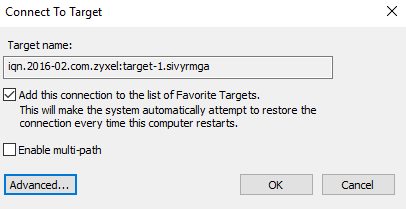
- Select the "Discovered target" vol and press the Connect button.
- Click the "Advanced…" button
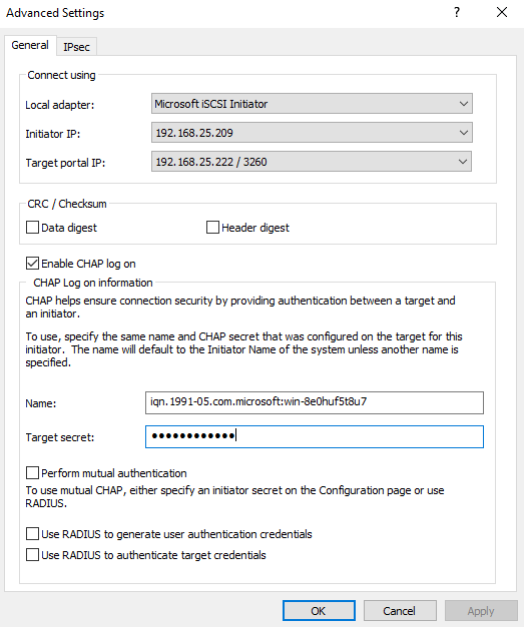
- Select the following options:
- Local Adapter – Select "Microsoft iSCSI Initiator" from the drop-down
- Initiator IP – Select the computer interface to use to initiate the connection
- Target portal IP – Click the drop-down and select the option with the NAS IP
- Enable CHAP log on – Check this box and provide the "Target secret" key
- Click OK
- Back at the "Connect To Target" window, click OK to initiate the iSCSI connection

- Once connection is successful the Target status will show "Connected". Press the Disconnect button when prepared to end the iSCSI connection.

Comments
0 comments
Please sign in to leave a comment.