To specify which zones and IP addresses can access the admin web configurator screen go to, Configuration → System → WWW. From this menu you will see an option for Admin Service Control and User Service Control.
Note: Admin Access Control deals with management access accounts (to the web configurator).
User Access Control deals with user access account for features like the built-in web authentication (hotspot, captive portal).
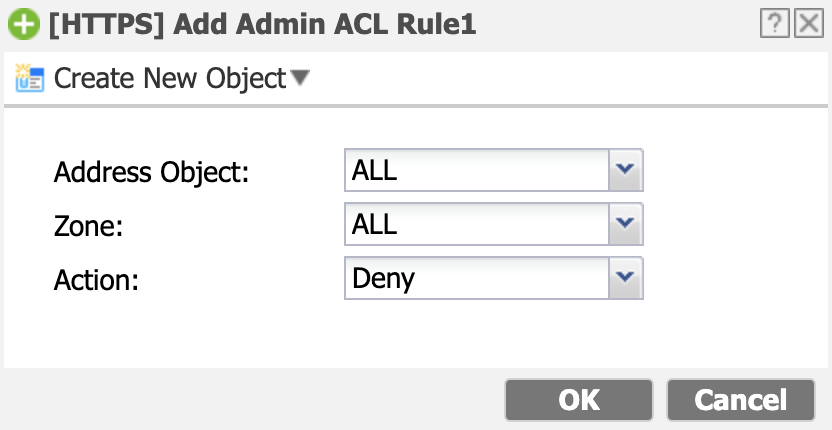
For the purpose of this article we will be concentrating on the Admin Access Control setup. This will allow us to set up some limitations as far as what zones and/or IP addresses can access the admin menu. By default the device will allow access to the admin WebUI from anywhere. Unfortunately the default rule cannot be edited to set it to deny traffic by default. Click the Add button to insert a deny rule.
- Address Object - Set this option to "ALL"
- Zone - Set this option to "ALL"
- Action - Set this option to "Deny"
- Click the OK button to make this entry

Now that the deny rule is created we can add the rules for the hosts that will be allow access to the admin WebUI. To add a host device click on the Add button and do the following.
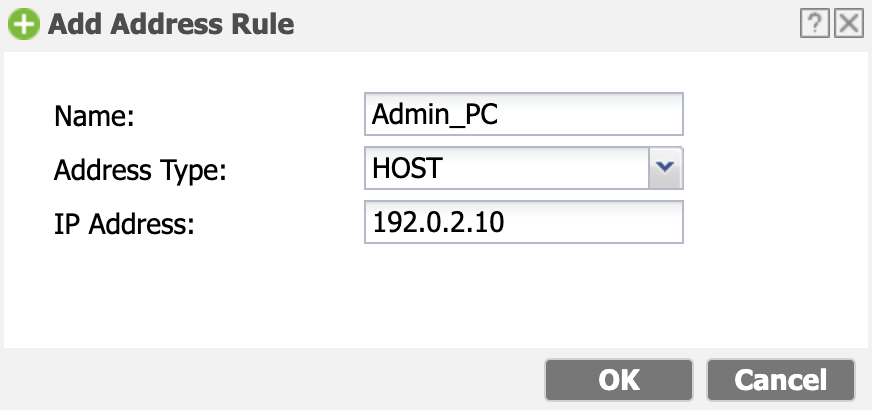
Create a host object if you do not have any created already. Click on Create New Object → Address to add a new host object.
- Name - Provide a name identifier for the address object
- Address Type - Select HOST from the dropdown
- IP Address - Type in the IP address of the host
- Click the OK button to insert the object

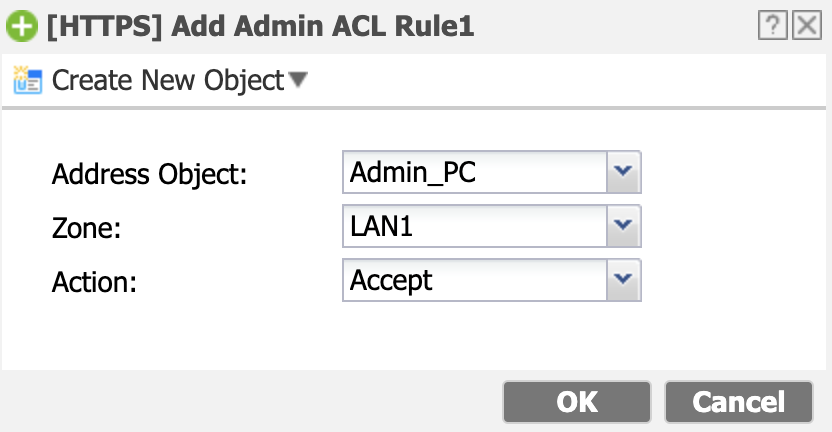
Now that the address object has been created we can complete the Admin Service Control rule.
- Address Object - Select the address object created for the host machine
- Zone - Select the zone the host is connected to LAN1, LAN2, DMZ, etc
- Action - Set this option to "Accept"
- Click the OK button to insert the rule

Repeat the process to add additional hosts that will have access to the admin WebUI.
Before all the settings are applied make sure that the Deny rule is the last rule listed. All rules will be read in order so we need to make sure this is the last rule and all the rules to accept communications are listed first. If the Deny rule is not the last on the list, click on the rule and select the option to "Move", specify the rule number you will to move the rule to and hit the Enter/Return key on your keyboard.

The end result should look like the example below. The deny rule is at the end of the list.

Once we have verified these settings click on the Apply button to save the settings to the configuration. This same type of setup can be applied to the Telnet, SSH and FTP in their menus.
Comments
0 comments
Please sign in to leave a comment.