This article will assist on setting up 1:1 NAT rules on the ATP/VPN series gateways.
Overview
NAT (Network Address Translation - NAT, RFC 1631) is the translation of the IP address of a host in a packet. For example, the source address of an outgoing packet, used within one network is changed to a different Ip address known within another network. Use Network Address Translation (NAT) to make computers on a private network behind the Zyxel device available outside the private network. If the Zyxel device has only one public IP you can make the computers in the private network available by using ports to forward packets to the appropriate private IP address.
1:1 NAT allows you to map one internal address to one external address. If you have a block of public IP addresses assigned by the ISP (Internet Service Provider), you can use this mechanism to make the server publicly available. For example, if you have a server hosting multiple services (mail and web host, etc.), you can use a 1:1 NAT rule to open all ports/services to the internal server.
Supported Devices
ATP100
ATP100W
ATP200
ATP500
ATP700
ATP800
VPN50
VPN100
VPN300
VPN1000
USG FLEX 100
USG FLEX 100W
UGS FLEX 200
USG FLEX 500
USG FLEX 700
Scenario
This guideline describes how to setup 1:1 NAT in ZLD enabled appliances.
Let's say the Zyxel appliance has some extra IP-addresses available. With 1:1 NAT all requests to e.g. 212.130.62.52 will be directly forwarded to the selected internal client.
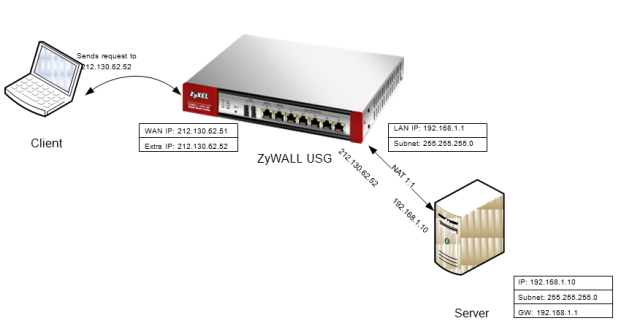
Create Address Objects
To create a NAT One-to-One rule, the simplest way is to start with creating address objects.
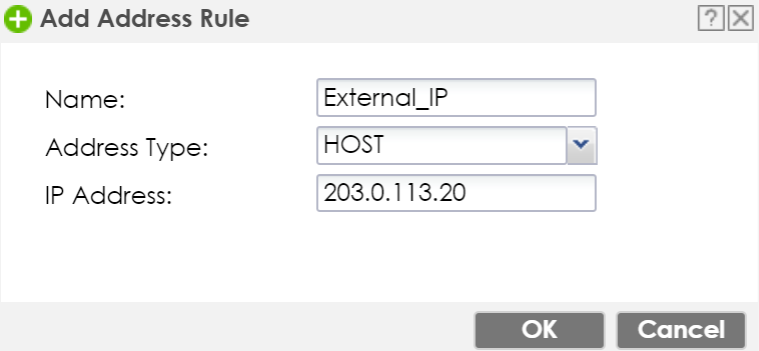
In this tutorial we will create two objects, one for the secondary WAN IP-address and one for the server's internal IP address.
To create an address object, go to the Configuration(![]() ) menu. Select the Object → Address/Geo IP menu. Click the Add button.
) menu. Select the Object → Address/Geo IP menu. Click the Add button.
- Give the object a name.
- Choose Host as Address Type.
- Insert the secondary WAN IP address.
Use the same step for the server's host object.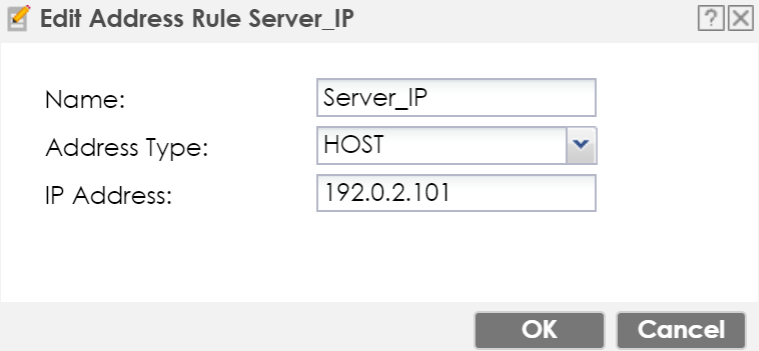
Create NAT Rule
To create the NAT rule, go to Configuration(![]() ) → Network → NAT menu, and click the Add button.
) → Network → NAT menu, and click the Add button.
- Enable rule.
- Insert a rule name.
- Select 1:1 NAT.
- Choose the incoming interface (usually WAN1 or ge2).
- Leave the "Source IP" set as any.
- Select the new External_IP object as "External IP".
- Select Server_IP as "Internal IP".
- Set Port Mapping Type as any.
- Click the OK button.
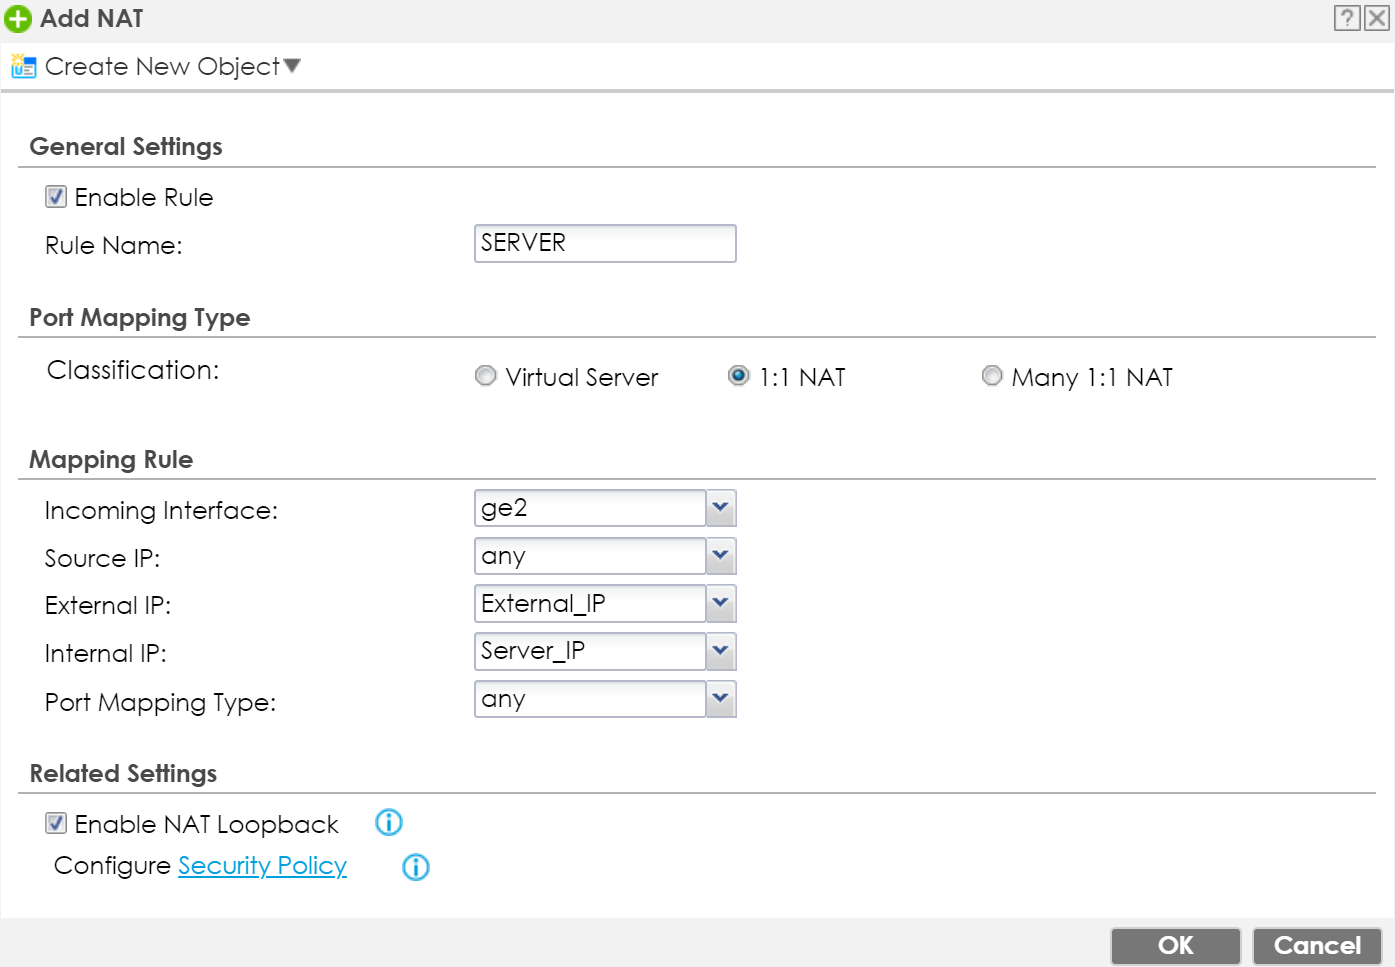
Note: NAT Loopback can be activated, so internal clients can contact server with public IP-address.
Create Policy Control Rule
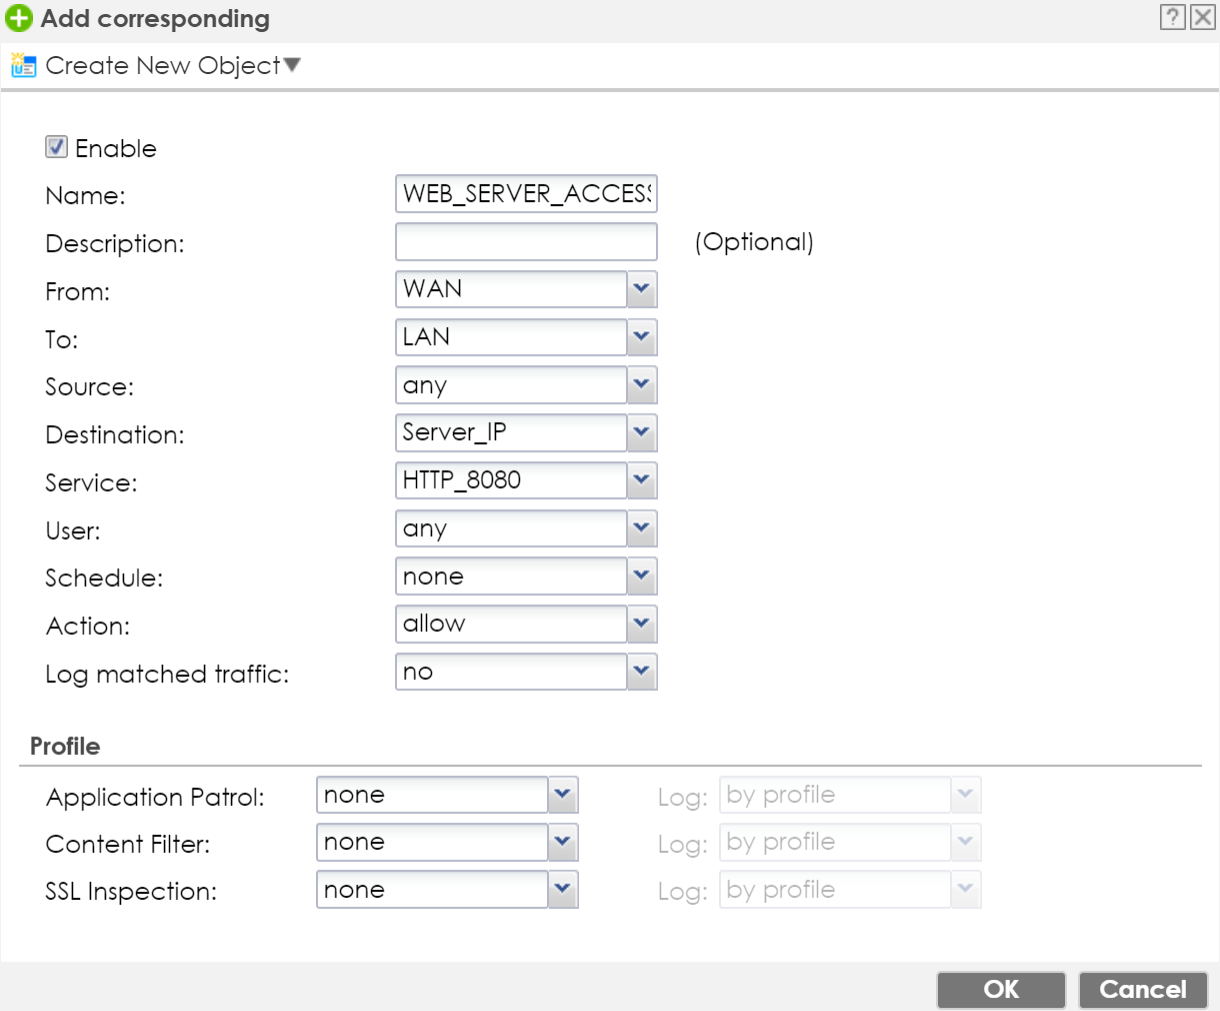
As the final step, we need to create a Policy Control rule, to allow traffic to pass through to the server. Go to the Configuration(![]() ) → Security Policy → Policy Control menu and press the Add button to insert a rule.
) → Security Policy → Policy Control menu and press the Add button to insert a rule.
- Provide a name to the Policy Control rule.
- Select "FROM" WAN "TO" LAN.
- Insert your servers IP address object as "Destination".
- Select your preferred Service or Service Group. In this case HTTP_8080 is selected.
- Set "Action" to allow.
- Enable Log if needed.
- Click the OK button.
Comments
0 comments
Please sign in to leave a comment.