

This guide will assist in the configuration of the Zyxel IPSec VPN Client (version 3.8.204.61.32) for VPN connectivity with Nebula CC IPSec Remote Access VPN feature.
Overview
A VPN (virtual private network) provides a secure communication between sites without the expense of leased lines. VPNs are used to transport traffic over the internet of any insecure network that uses TCP/IP communications. A remote access VPN (client-to-site) allows employees who are traveling or teleworkers, secure access to company network resources. There multiple types of VPN protocols/technologies, that can be used to establish a secure link to company network, L2TP, PPTP, SSL, OpenVPN, etc. This guide will reference the IPSec protocol to establish a secure VPN tunnel between external hosts (users connected to the internet outside the company network structure) and the NebulaCC gateway. Third party IPSec software is required to establish the VPN connection as current operating systems lack a built-in IPSec client. This walkthrough will help configure the VPN setup on the IPSec VPN client (version 3.8.204.61.32).

Supported Devices
NSG50
NSG100
NSG200
NSG300
Nebula CC VPN Setup
Click into the new Nebula CC user interface and go to Security gateway → Configure → Remote access VPN, specify the Client VPN server as IPSec client, if your NSG is located behind the NAT gateway, you will need to type NAT traversal.
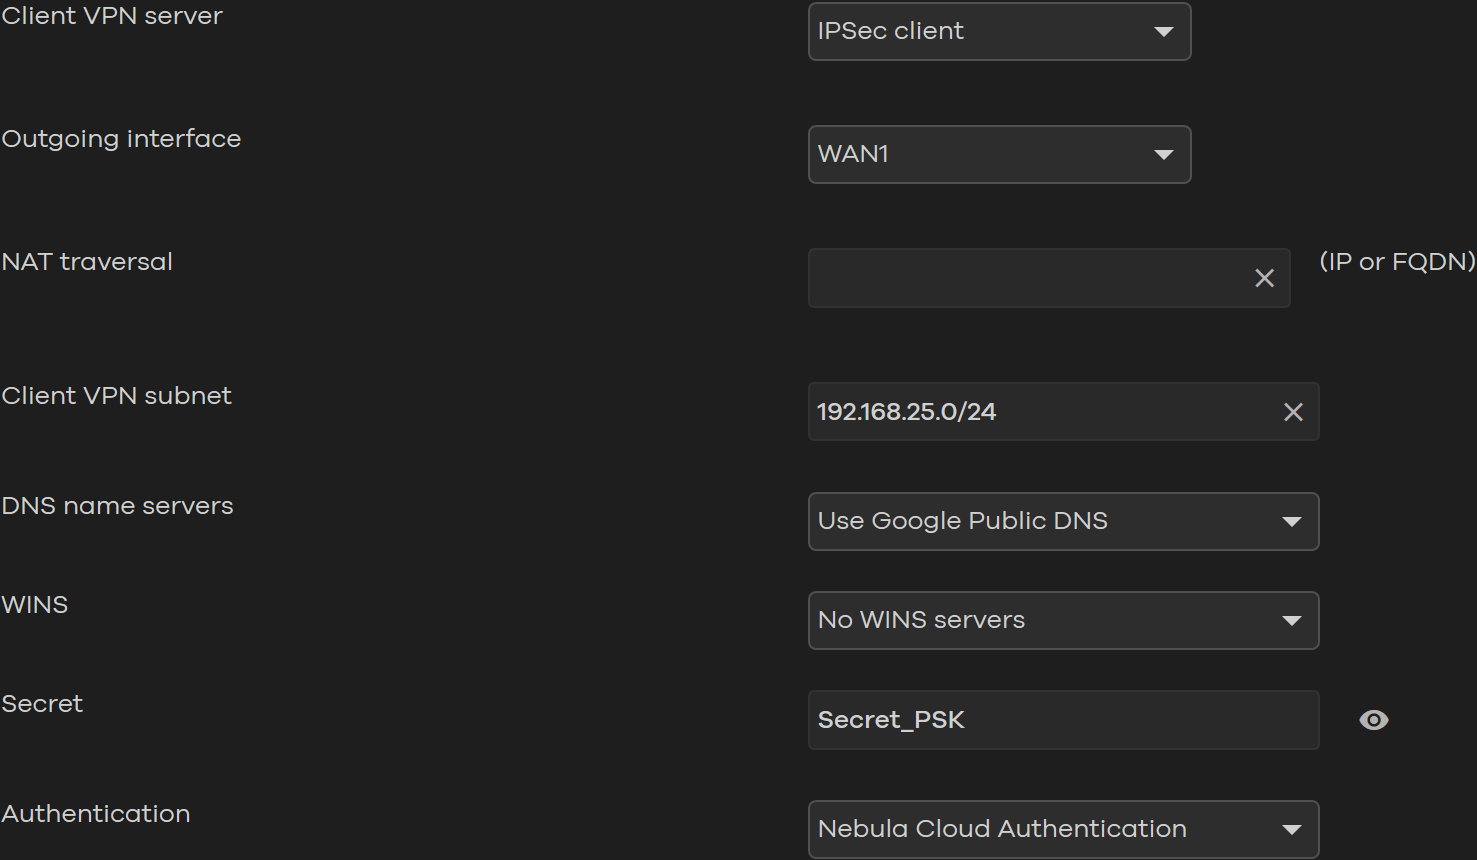
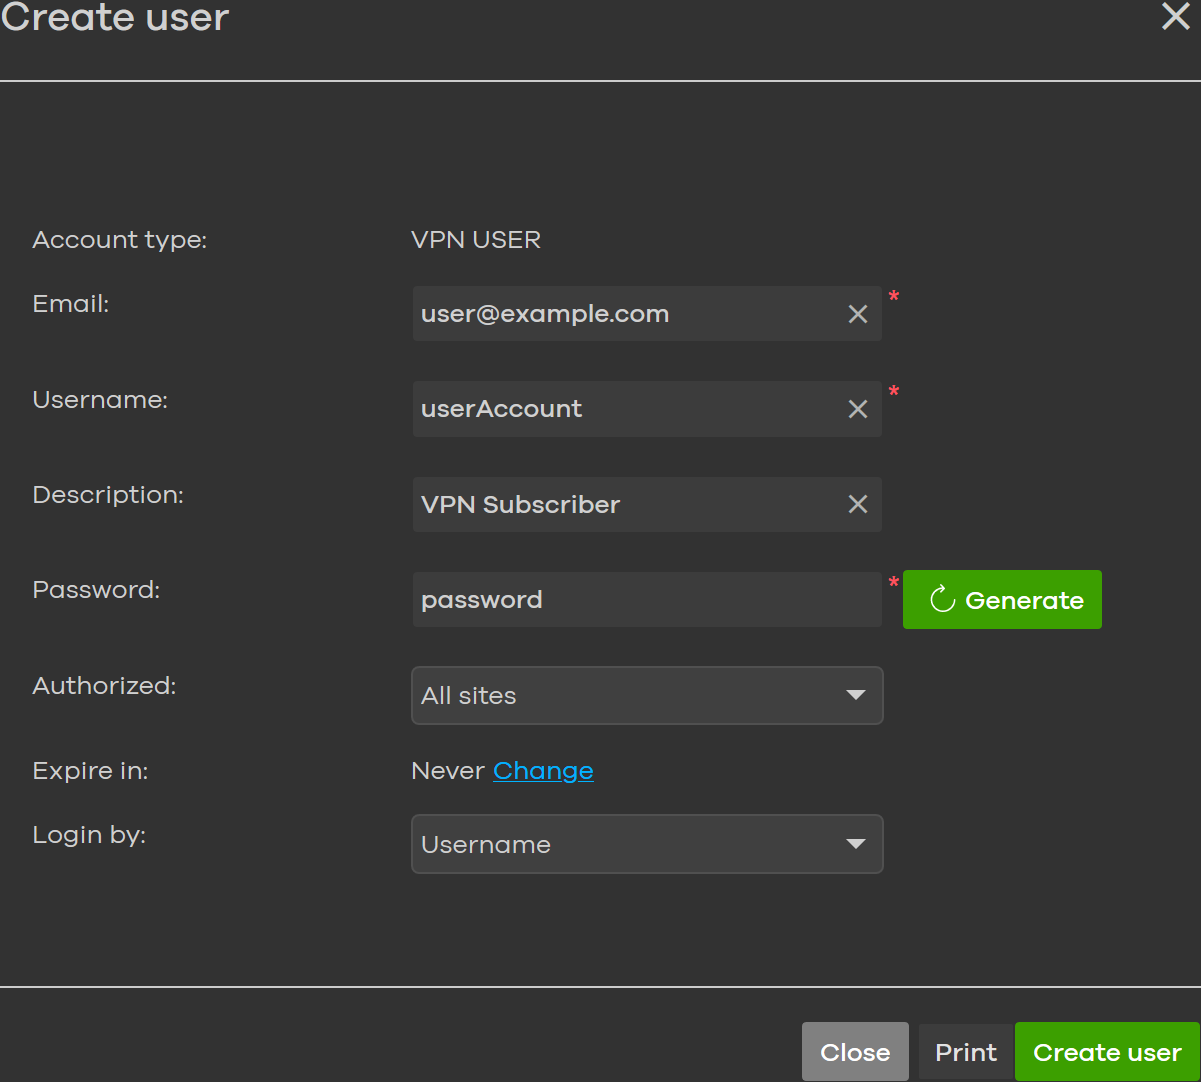
Create a VPN client account in Organization-wide → Configure → Cloud authentication if your auth. type is Nebula Cloud Authentication.
Zyxel VPN Client Setup
Latest version of the Zyxel IPSec VPN client can be downloaded from here. Once the client has been installed, launch the program and open the Configuration Panel. Click on the "IKE V1" folder under VPN Configuration, once the folder is selected hit the "Ctrl + N" keys on the keyboard to add an "Ikev1Gateway" rule. Make the following changes on the rule:
- Remote Gateway
- Interface – Select the interface the computer will use to establish the VPN connection. Set this to Any if the VPN client will be allowed to use any connection available on the computer.
- Remote Gateway – Type in the FQDN/DDNS/IP of the NebulaCC gateway you will be connecting to.
- Authentication
- Select the "Preshared key" option.
- Type in the preshared key used on the NebulaCC IPSec configuration and "Confirm" the key.
- X-Auth
- Enable – This box should be checked.
- X-Auth Popup – This box should only be checked if you wished to be prompted for the username and password upon connection.
- Login – Provide the NebulaCC VPN account username. Only if "X-Auth Popup" is unchecked.
- Password – Provide the NebulaCC VPN account password. Only if "X-Auth Popup" is unchecked.
- Cryptography
- Encryption – Select 3DES from the drop-down.
- Authentication – Select SHA-1 from the drop-down.
- Key Group – Select DH2 (1024) from the drop-down.

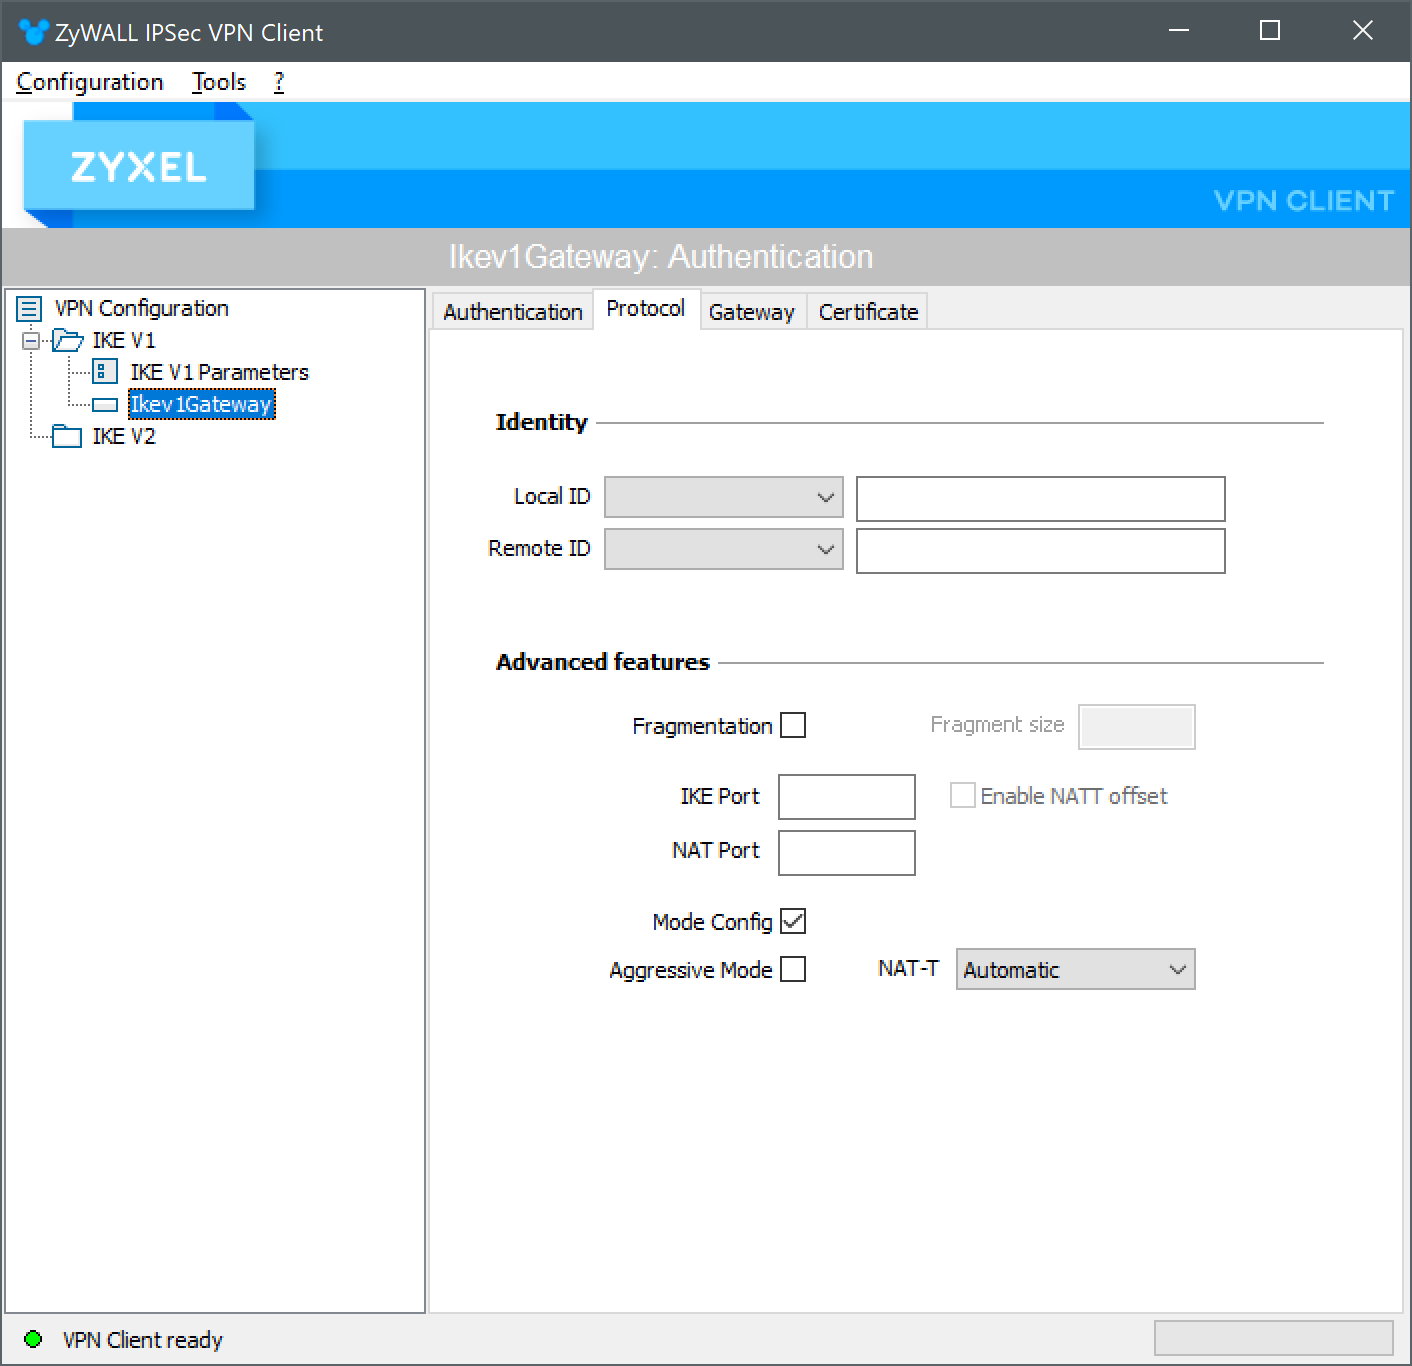
From the "Ikev1Gateway" click on the Protocol tab and make the following change:
Enable the Mode Config option.
While "Ikev1Gateway" is highlighted hit the "Ctrl + N" keys on the keyboard again to add the "Ikev1Tunnel" portion of the connection. Make the following changes:
- Address
- VPN Client Address – Leave this option as is.  (0.0.0.0 by default)
- Address Type – Select Subnet Address from the drop-down.
- Remote LAN Address – Type in the NebulaCC local LAN IP scheme.
- Subnet Mask – Type int he NebulaCC local LAN subnet mask.
- ESP
- Encryption – Select 3DES from the drop-down.
- Authentication – Select SHA-1 from the drop-down.
- Mode – Select Tunnel from the drop-down.
- PFS
- Leave this option unchecked.
- Lifetime
- The lifetime is the amount of time, in seconds, before the client re-negotiates the algorithms.

Once all the settings have been made, click the Configuration option on the toolbar and select Save. This will save all the changes made to the client.
To establish the VPN connection to the NebulaCC gateway, right-click the "Ikev1Tunnel" option and select Open Tunnel or hit (Ctrl + O) on your keyboard.
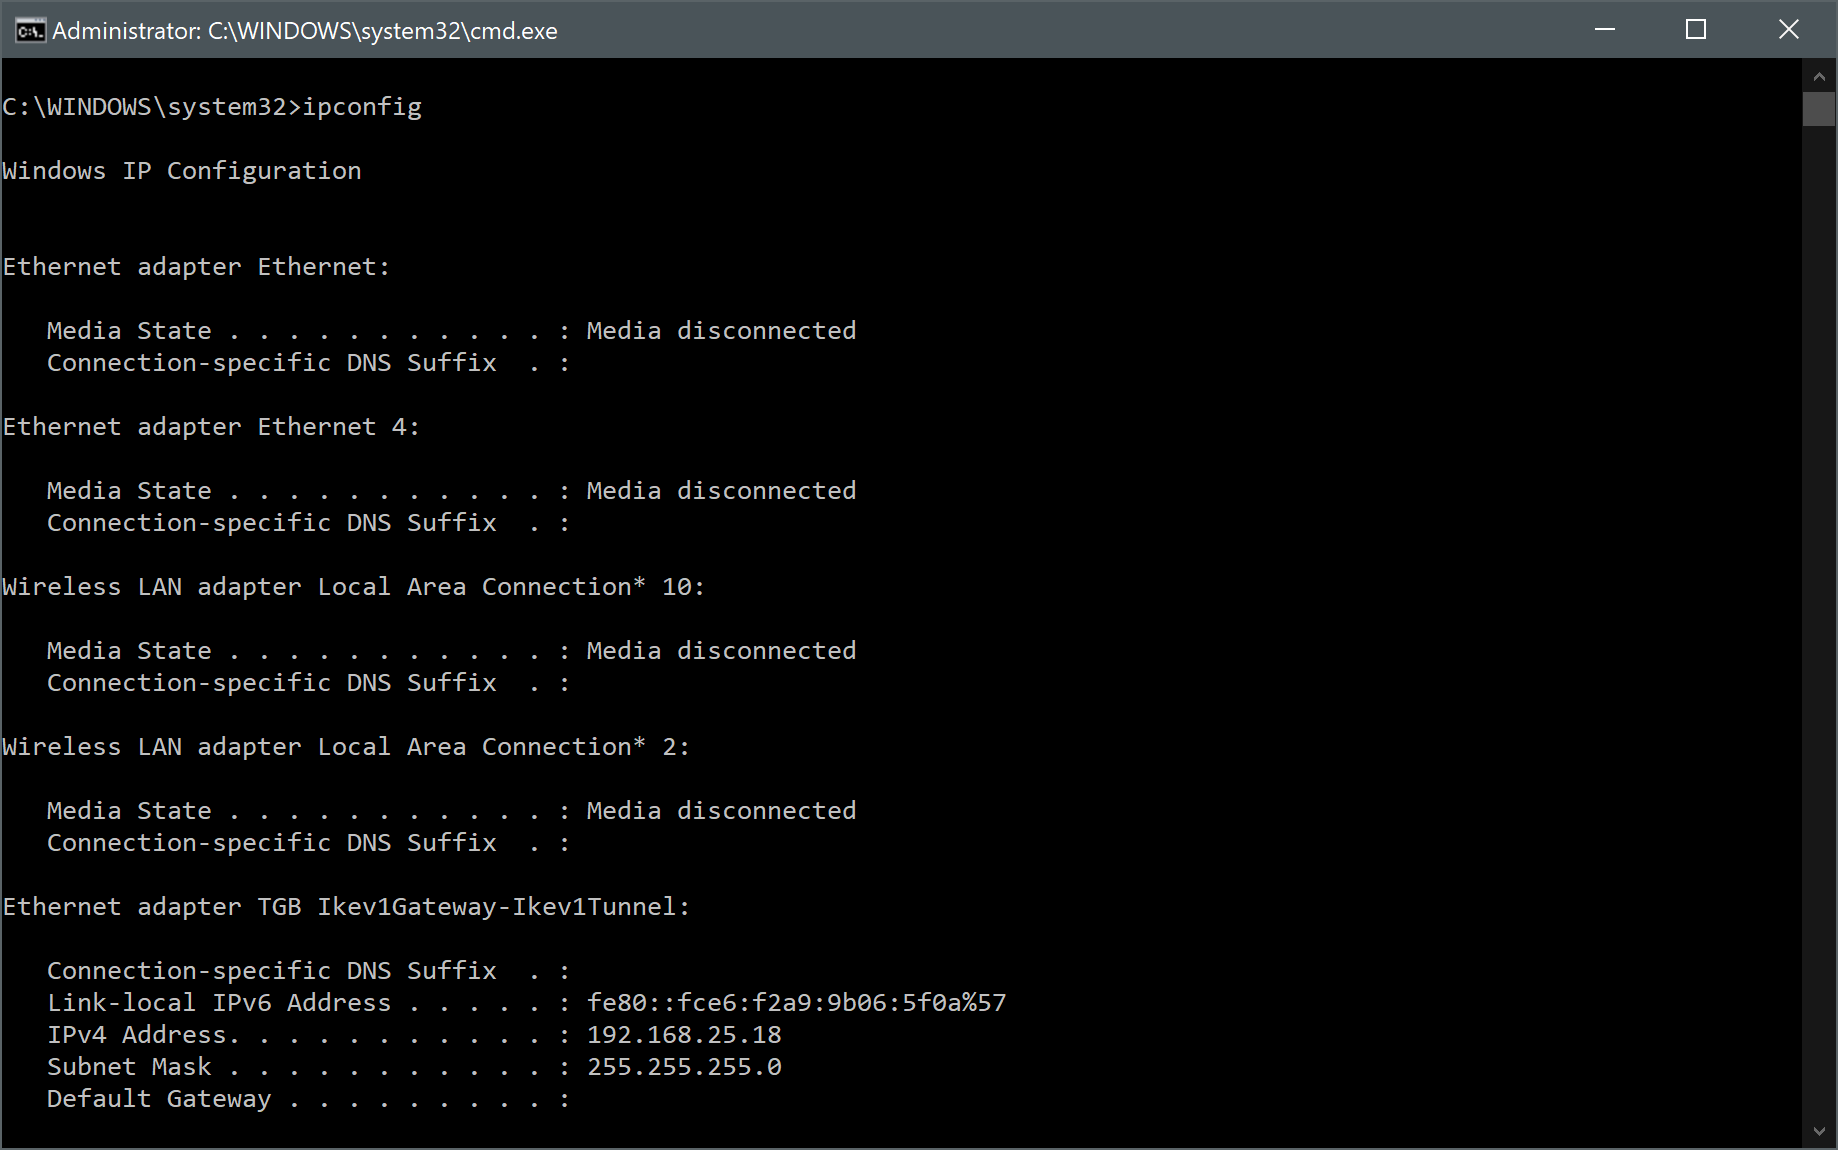
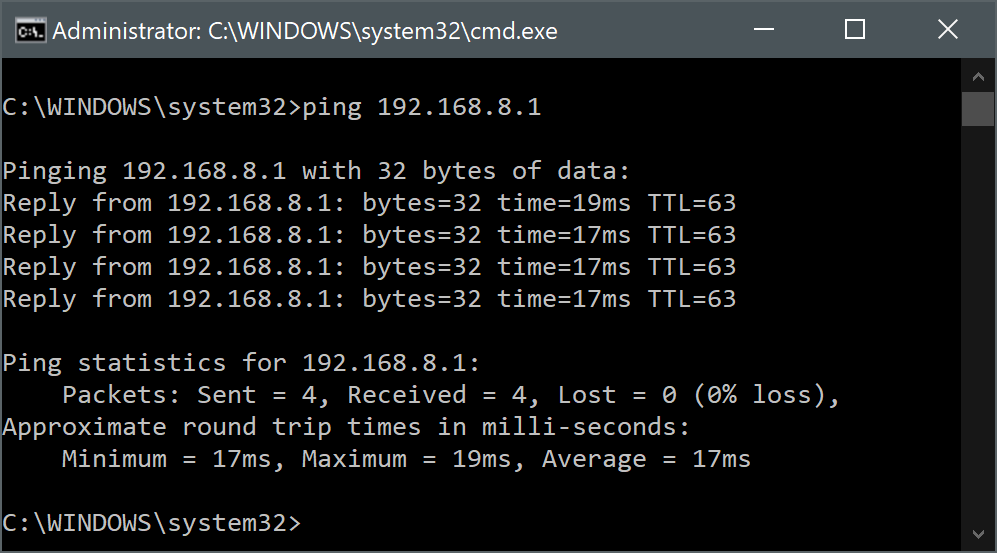
Once the VPN connection is established you can verify the connection by opening a command prompt windows (or PowerShell) and issuing the following commands.
- ipconfig
This command will provide the IP address for the VPN interface.
- ping remote_address
This command will allow you to run a ping test to a device located on the NebulaCC gateways LAN network.
Comments
0 comments
Please sign in to leave a comment.