
Supported Devices
NXC2500
NXC5500
Overview
Rogue AP
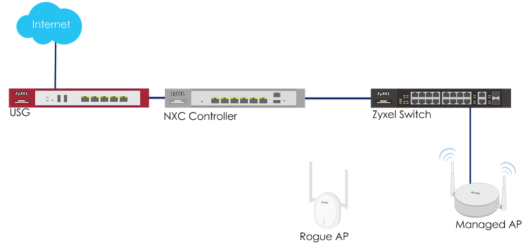
Test Scenario
The Rogue AP in the scenario diagram above is an NWA3160-N access point which will be connected via Ethernet to the switch. The NWA3160-N has been configured to use the same SSID the managed AP's are broadcasting. The Wi-Fi broadcast is "ZyTSAP".
Monitor AP Setup
Configure a monitor profile in Configuration → Object → MON Profile. Select the default profile and click Edit to change settings. Check the "Scan Channel Mode" is set to auto and "Country Code" is correct and is the location where you use the AP. Click OK to save the settings.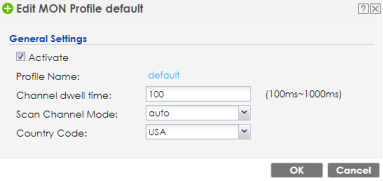
Configure an AP to monitor mode in Configuration → Wireless → AP Management. Select the AP which is going to work in monitor mode and click Edit to change settings. Check the "Override Group Radio Setting" and select MON Mode with default radio 1 profile which is set in the step above. Set the radio 2 profile the same way, if the monitor AP is dual radio (2.4GHz and 5GHz). Click OK to apply.
Detecting Rogue AP
There is no easy way to detect a rogue AP on the network. Multiple factors have to be taken into consideration to find rogue AP's. Here are a few tips to find rogue AP's on the network.
- Check the ARP table. This should be done on managed switches, AP controller, AP's and/or gateway appliance.
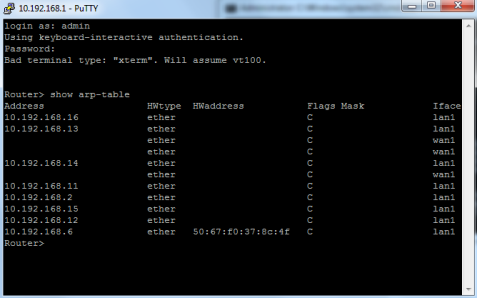
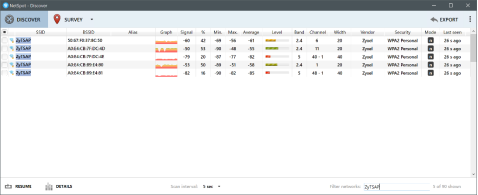
- Run a wireless site survey on the network. There are different programs you can use to scan the radio air space for all Wi-Fi signals in the area. For this scenario NetSpot was used to run a site survey. Based on the reported info we can see that there is a device with BSSID = 50:67:F0:37:8C:50 broadcasting our test Wi-Fi signal, ZyTSAP. Based on the ARP table above we can see that a device with 50:67:F0:37:8C:4F is connected to the network, this is the LAN MAC address for the rogue AP. (Note: The 6th octet is different and in most cases the Ethernet connection will have a different MAC from the wireless radios, but they tend to be consecutive addresses.)
- Now that we know there is a rogue AP on the network, we can input the MAC address manually to the rogue AP list or mark it as a rogue AP from the "Discovered APs" list. The list can be found under Monitor → Wireless → Detected Device. Find the suspect device on the list, select it and click the Mark as rogue AP button at the top of the list.

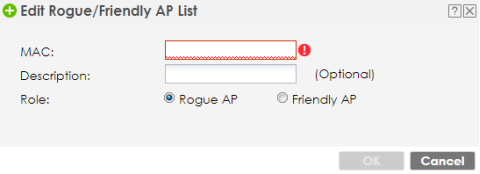
- You can enter the device manually by going to menu, Configuration → Wireless → Rogue AP and clicking the Add button under "Rogue/Friendly AP List". Provide the MAC address, Description and Role for the AP.
- Because the rogue AP is physically connected to the network, we want to place its broadcast into Containment. By placing the AP into the containment list, we can guarantee that users will not be able to connect to the broadcast from this device.
Before Containment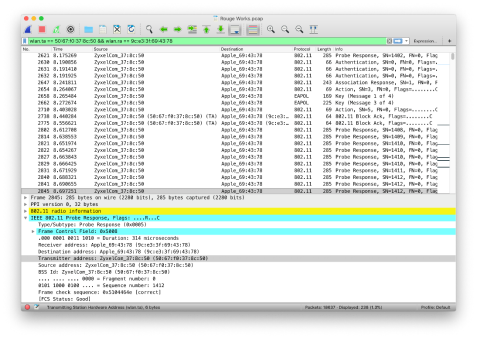
- Packet capture shows clients authenticate to the rogue AP. Since this is a test scenario and we have access to the rogue AP, we can look at the connected devices list and see that there are clients connected.

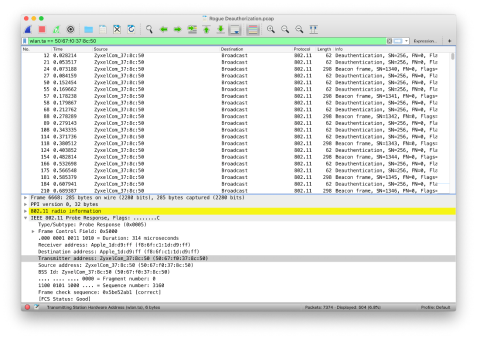
- Packet capture shows de-authentication frames are being broadcasted. This will cause all clients connected to the rogue AP to disconnect. The constant broadcast of de-authentication frames will keep clients from associating with the rogue AP.
- Packet capture shows clients authenticate to the rogue AP. Since this is a test scenario and we have access to the rogue AP, we can look at the connected devices list and see that there are clients connected.
Comments
0 comments
Please sign in to leave a comment.