

This walkthrough will go over syslog setup on the ATP/VPN appliances to sync with syslog server.
Log & Report Setup
To configure the syslog setting option on the ATP/VPN gateway, please go to menu, Configuration(![]() ) → Log & Report → Log Settings.
) → Log & Report → Log Settings.
The device has multiple profiles (Remote Server 1~4) to sync with different syslog servers. Select one of the available Syslog profiles and Edit.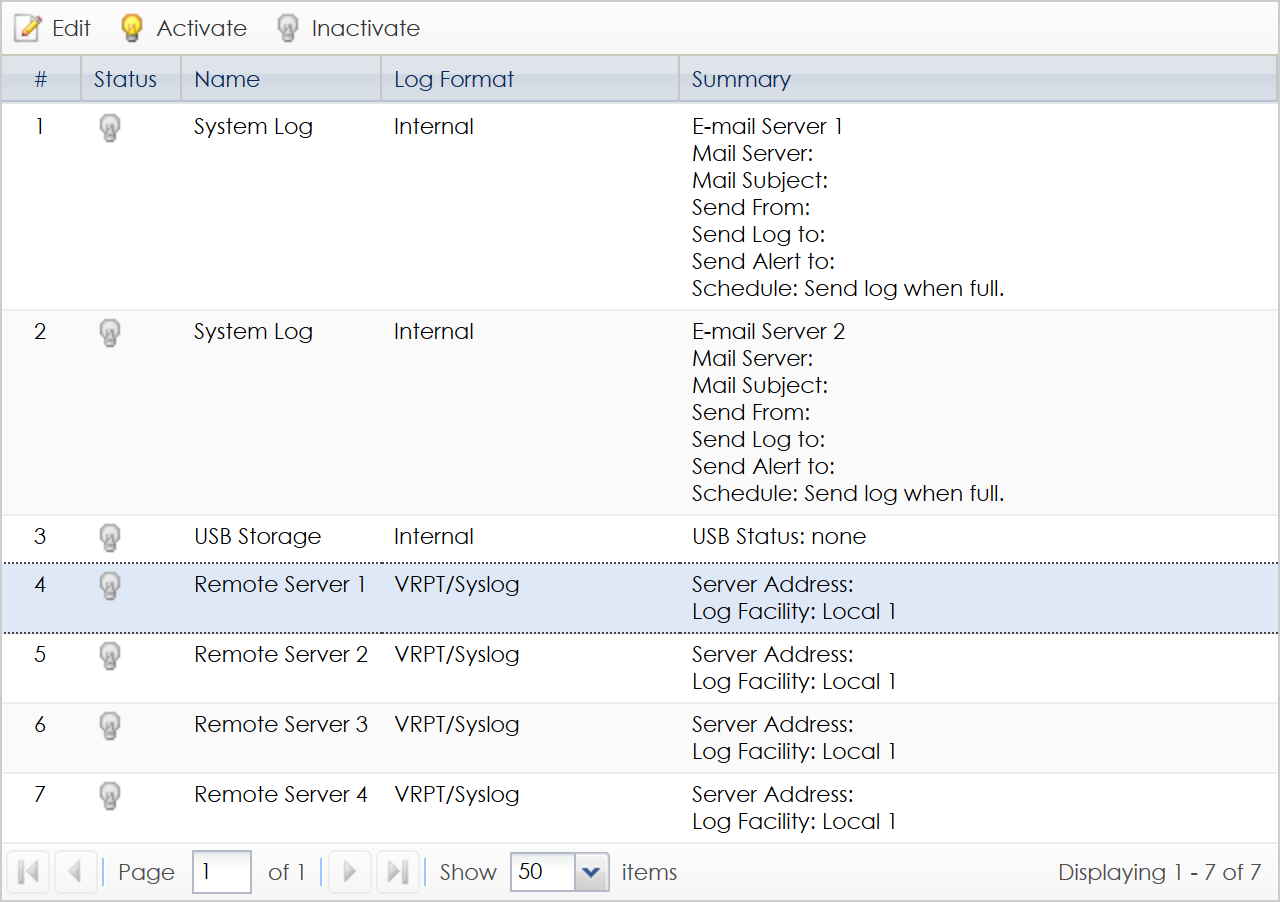
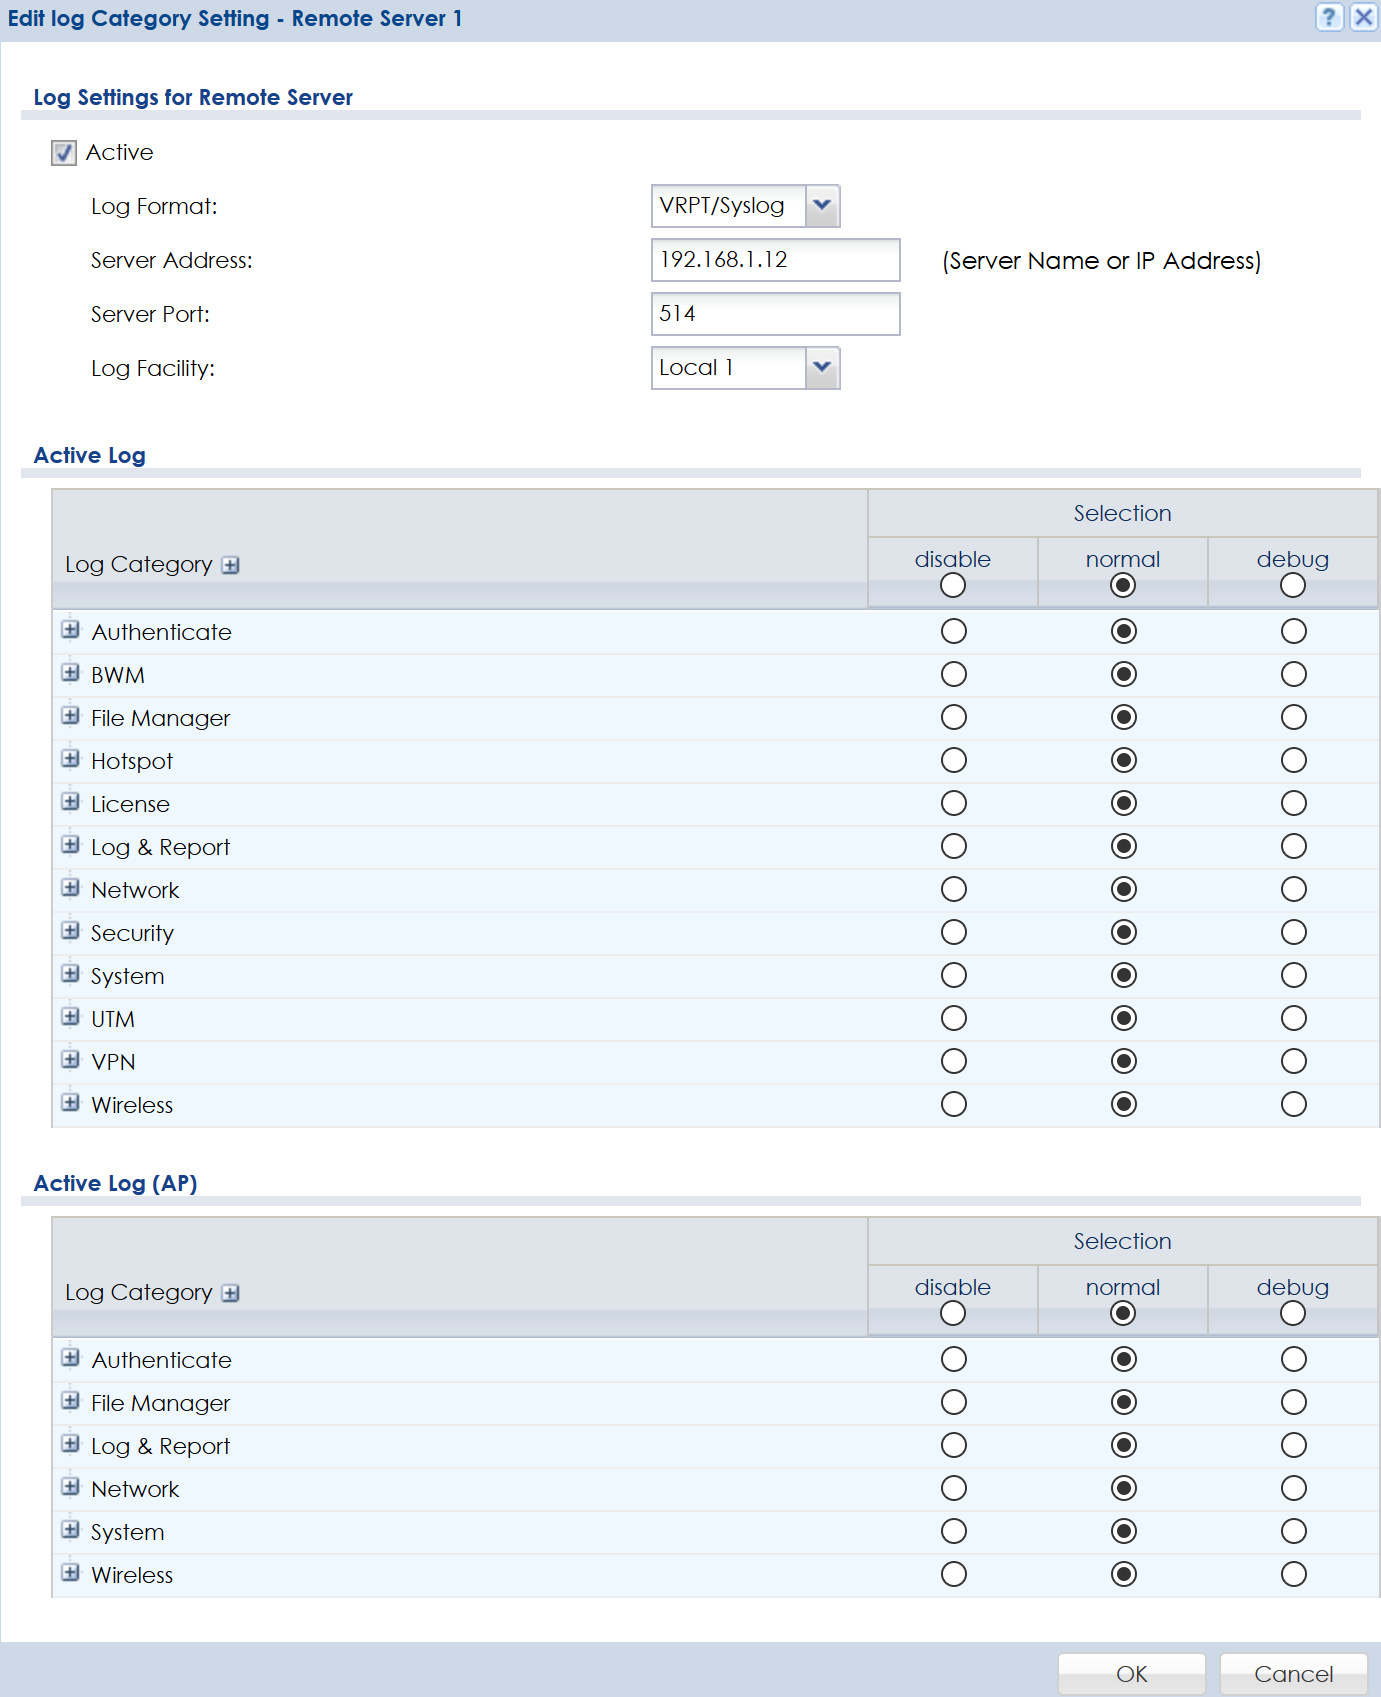
Make the needed changes to the configuration:
- Active - Check the box to enable the profile.
- Log Format - Select a syslog format based on your servers compatibility (VRTP/Syslog option works for most syslog servers).
- Server Address - Type the IP address of the syslog server.
- Server Port - Specify the syslog server port (514 is the default syslog port)
- Log Facility - Select the log facility you wish the appliance to sync with.
Note: A syslog server can sync logs with multiple appliances, the facility is used to separate the log entries from other devices it may be syncing with. - Active Log - Select the log categories you wish to sync with the syslog server.
Note: If you wish to sync all logs, select the "normal" option under Selection. - Active Log (AP) - Select the access point logs you wish to sync with the syslog server (if compatible APs are managed by appliance).
Note: If you wish to sync all logs, select the "normal" option under Selection. - Click OK to save the settings.
Syslog Server Setup
QNAP
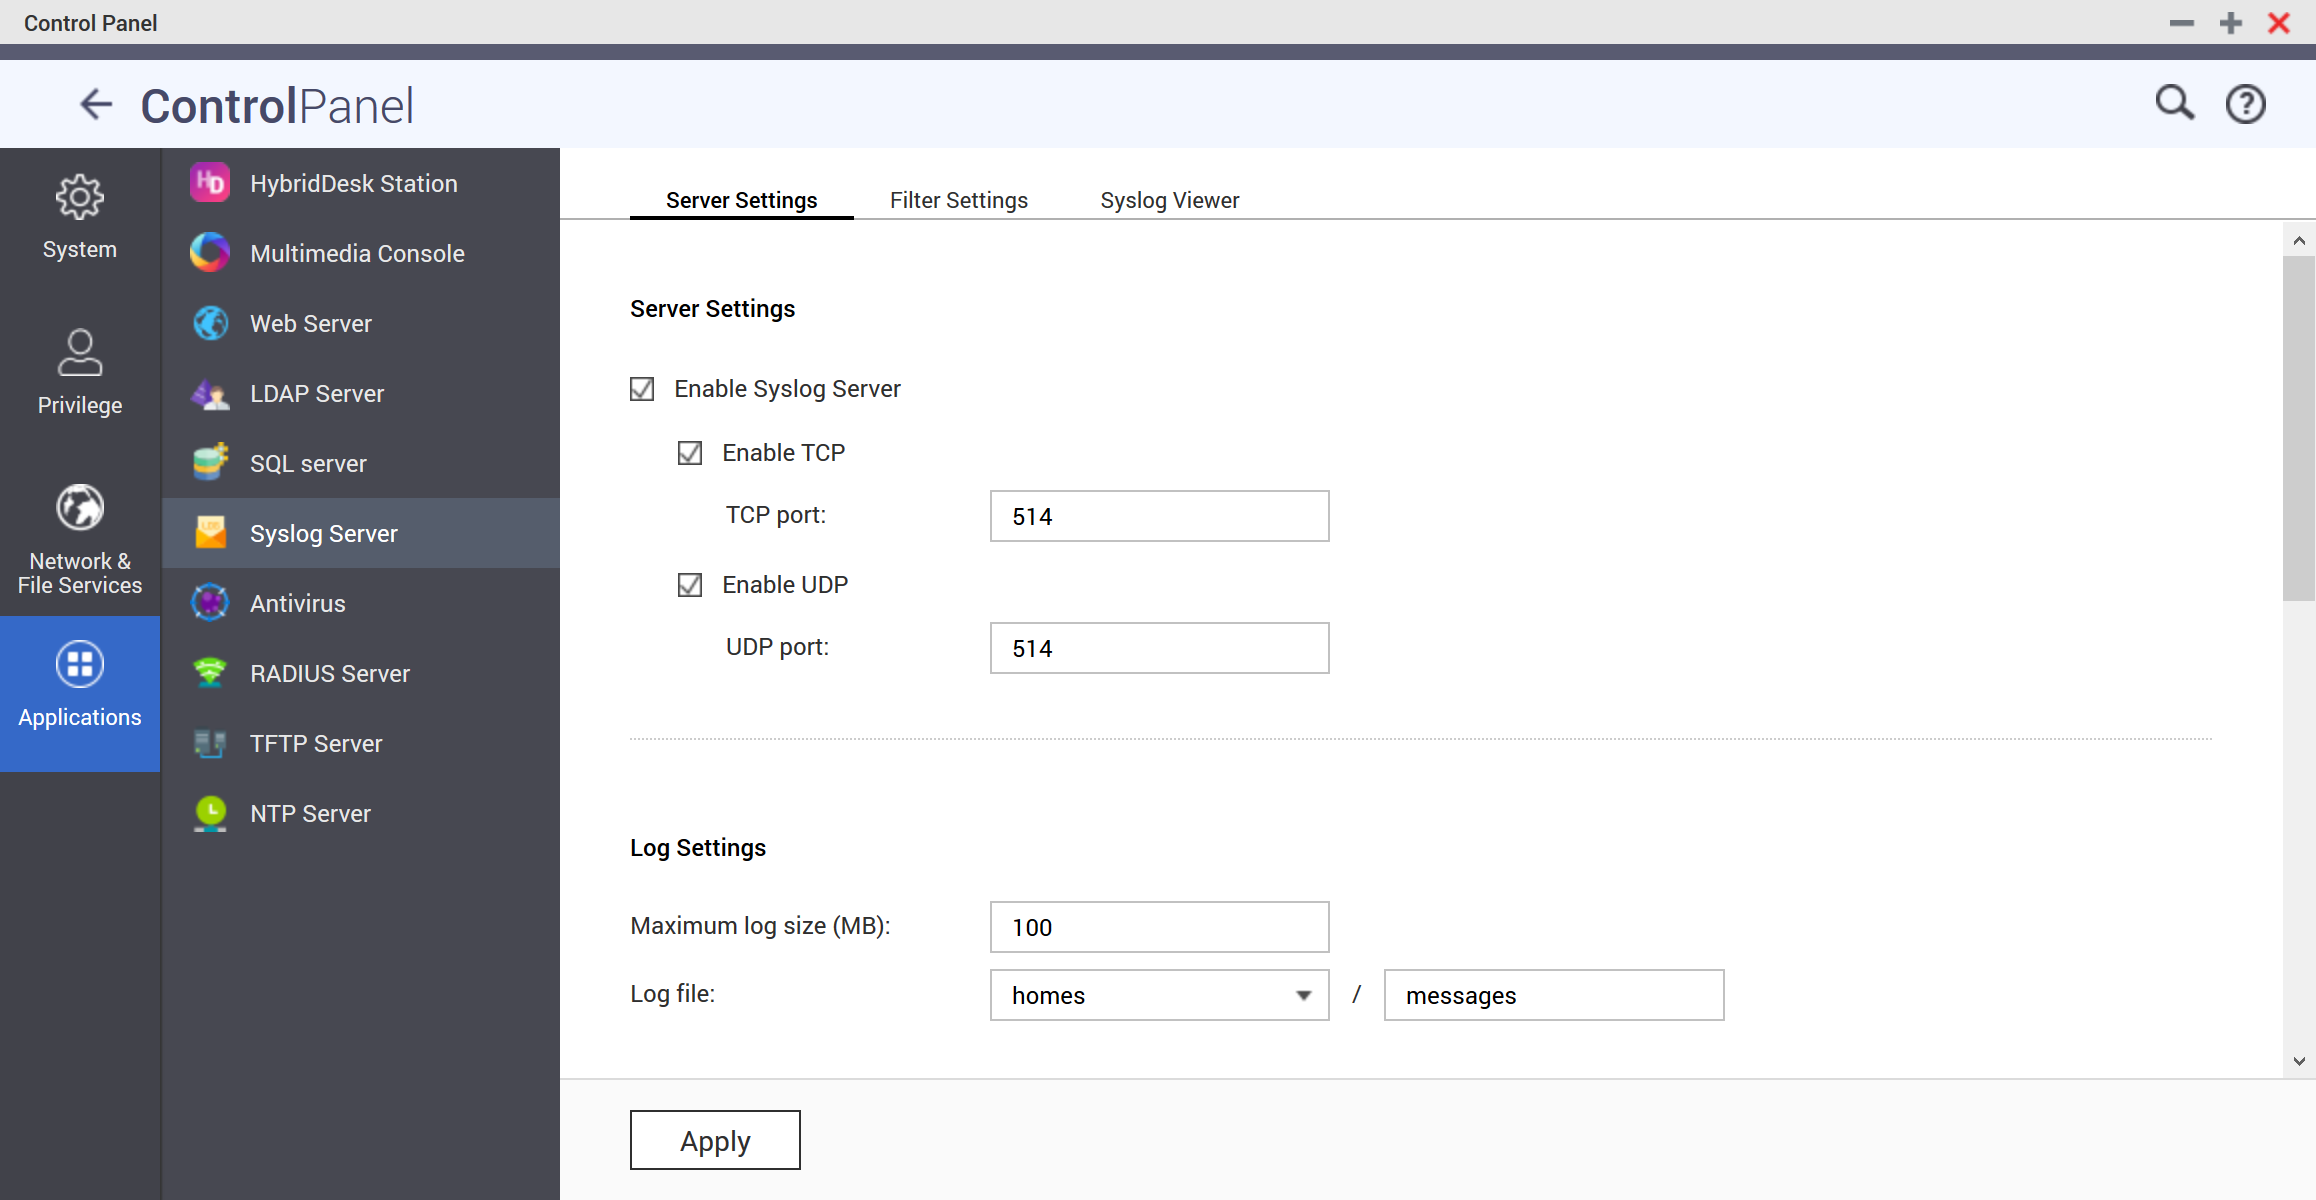
To enable the syslog server on the QNAP open the Control Panel and go to menu, Applications → Syslog Server and on the Server Settings tab do the following:
- Enable Syslog Server - Check the box to enable the server
- Enable TCP - use TCP port
- Enable UDP - use UDP port
- Maximum log size (MB) - Specify the log size the QNAP will keep before starting a new file. (Max is 100MB).
Note: If 100MB is set, once the log entries reach 100MB in file size it will start a new log file. - Log file - Specify where to save the log files.
- Click Apply to save the settings.
For detailed instructions from QNAP on how to enable the feature go here.
Zyxel NAS
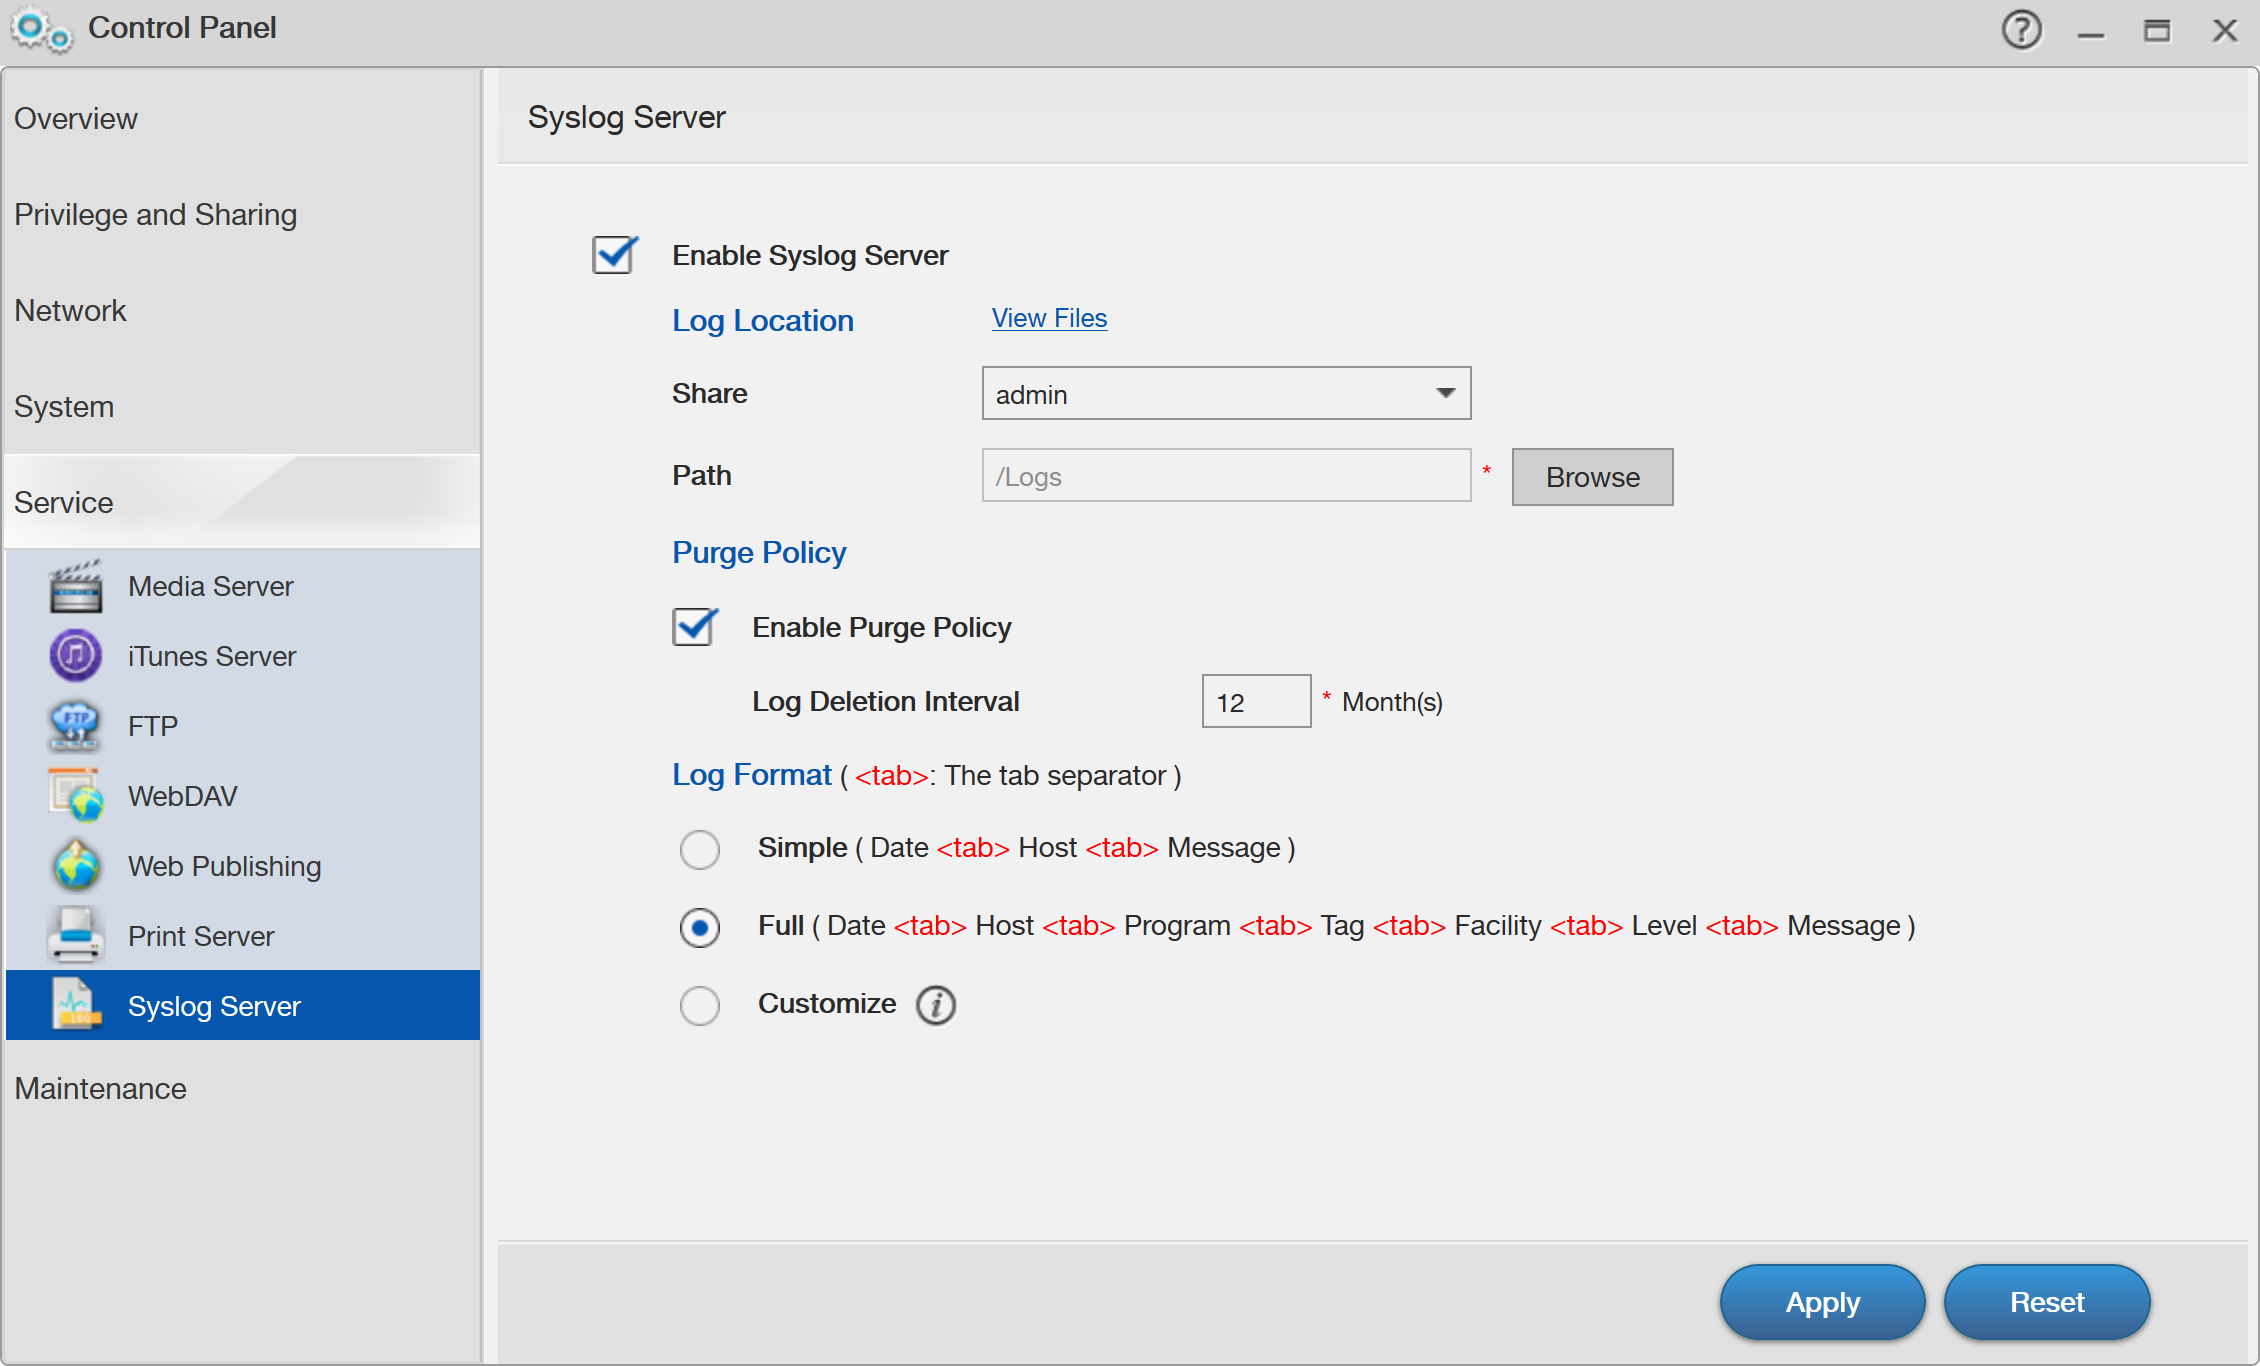
To enable the syslog server on the Zyxel NAS appliance open the Control Panel. From this menu go to, Service → Syslog Server. Make the following changes to enable the syslog server capability:
- Enable Syslog Server - Make sure this box is selected.
- Share - Select one of the shared directories.
- Path - By default the logs will be stored on the root of the directory. To select a specific folder to save the logs to click on Browse.
- Enable Purge Policy - [optional] Enable this feature to have old log files deleted from the NAS after a specific amount of time (in months).
- Log Format - Select the log save format. (Full is recommended)
- Click the Apply button to save the settings.
PRTG Syslog Receiver
To configure the syslog server settings on the PRTG Network Monitor open the configuration user interface (WebUI). Once logged in go to, Sensors → Add Sensor and select the ATP/VPN gateway from the list (monitoring software should show all devices connected to the network). Once you have selected the gateway you want to sync logs with click the Continue button on the PRTG configurator. A long list of PRTG sensors will appear, search for the "Syslog Receiver" and select it.
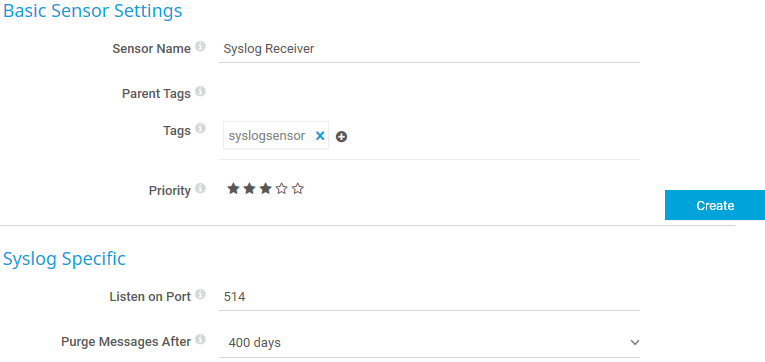
Make the necessary changes to the configuration:
- Sensor Name - Provide a name for the syslog receiver entry.
- Listen on Port - Specify syslog sync port (514 is default port).
- Purge Messages After - Specify a time period when to delete old log files. (default is 32 days. Min is 2 hours. Max is 400 days.)
- Click the Create button to save the settings.
Comments
0 comments
Please sign in to leave a comment.