

How to setup a Site-to-Site VPN connection between two ATP/VPN series appliances.
Introduction
This guide will explain how to configure a site-to-site VPN connection as shown in the picture below using the Express VPN Wizard:
For instructions on using the Express VPN Wizard please click here.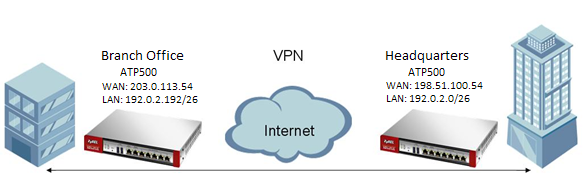
In the above scenario, the clients at the Branch office wants to be able to access the Headquarters entire LAN subnet and vice versa. The setup will be the same regardless what ATP/VPN model you are using. In this example we will be looking at a two ATP500's.
Express VPN Wizard
Login to the ATP/VPN WebUI and go to the Quick Setup menu(![]() ).
).
Once the wizard window opens select the VPN Setup option.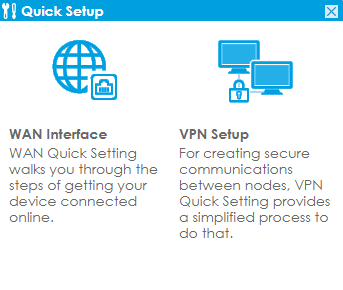
The VPN setup wizard supports the option to create Site-to-Site, Client-to-Site and/or L2TP VPN connection. In this scenario we are connecting two ATP500 gateways which would require a Site-to-Site connection. To create this connection select VPN Settings and click Next.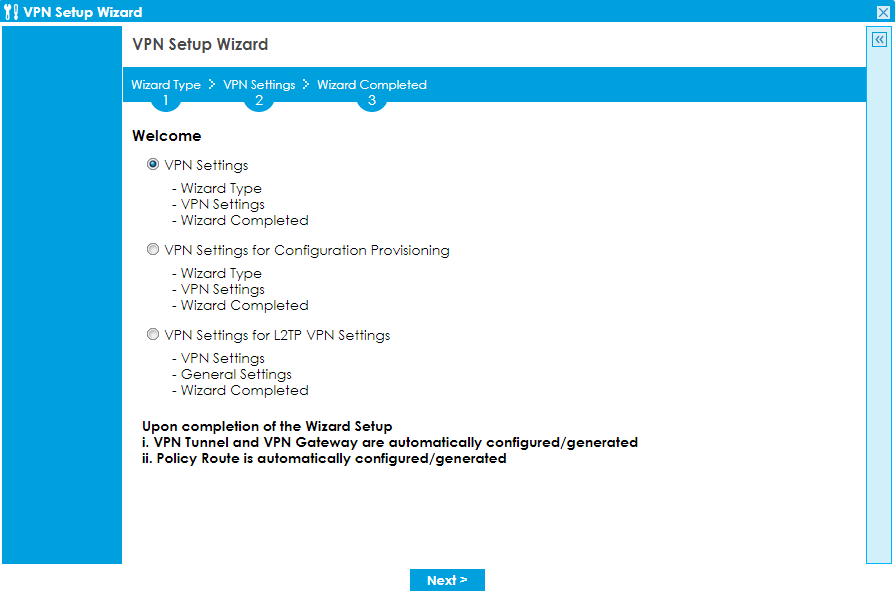
Select the Advanced option and click Next to continue with the VPN configuration.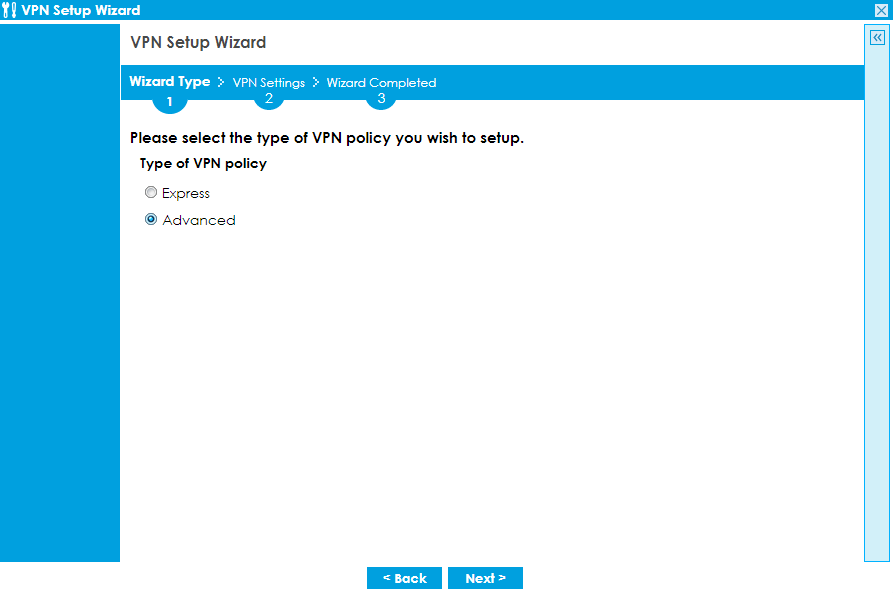
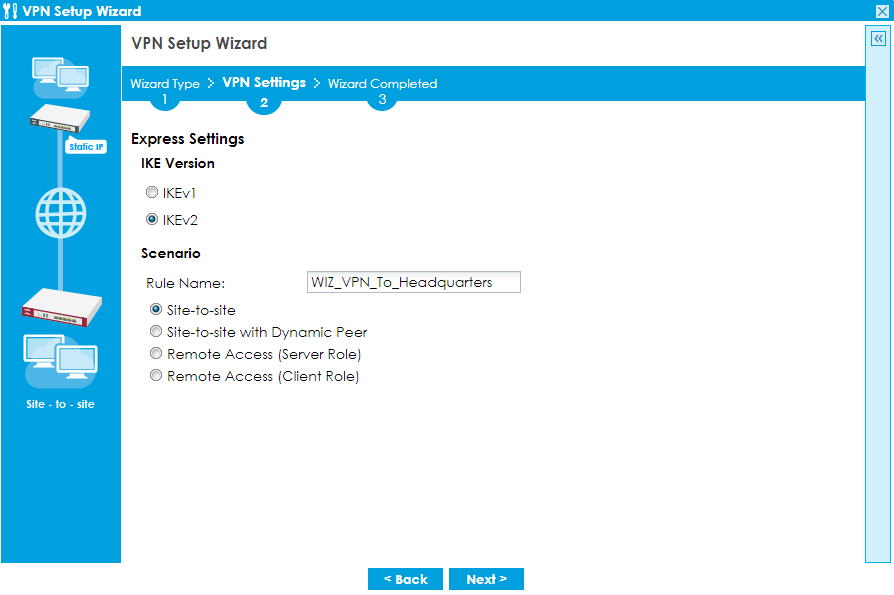
Provide the following details on the screen below for the VPN setup.
- IKE Version - IKEv1 or IKEv2 [IKEv2 is highly recommended]
- Rule Name - Provide a name for the VPN rule
- Select Site-to-Site for the application scenario
- Click Next to continue
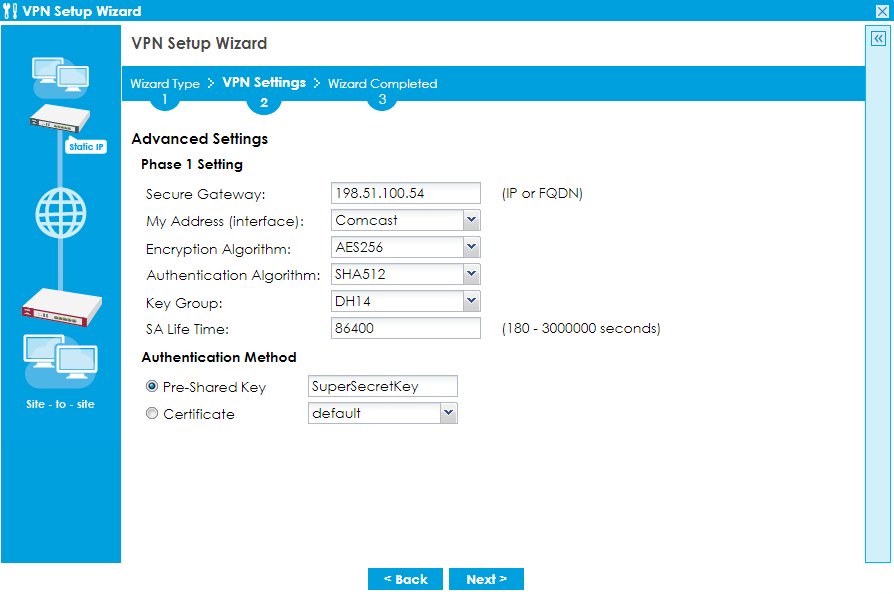
On the next screen provide the following details for the Phase 1 connection:
- Secure Gateway - Provide the WAN IP/FQDN/DDNS for the remote appliance
- My Address - Select the WAN interface you wish to use for the VPN
- Encryption Algorithm - Select the desired algorithm (options are DES/3DES/AES128/AES192/AES256)
- Authentication Algorithm - Select the desired algorithm (options are MD5/SHA1/SHA256/SHA512)
- Key Group - Select the desired Diffie-Hellman group (options are DH1/DH2/DH5/DH14)
- Pre-Shared Key - Create a key [this key must match on both sites]
- Click Next to continue
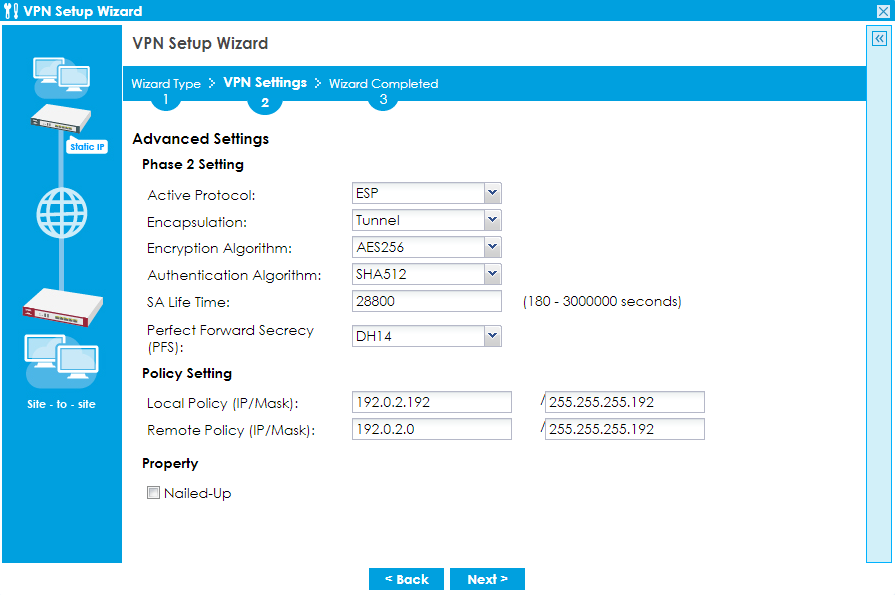
On the next screen provide the following details for the Phase 2 connection:
- Active Protocol - Select ESP
- Encapsulation - For a Site-to-Site connection select Tunnel
- Encryption Algorithm - Select the desired algorithm (options are DES/3DES/AES128/AES192/AES256/Null)
- Authentication Algorithm - Select the desired algorithm (options are MD5/SHA1/SHA256/SHA512)
- Perfect Forward Secrecy (PFS) - Select the desired Diffie-Hellman group (options are None/DH1/DH2/DH5/DH14)
- Local Policy - Type the IP and mask for the local network [the IP entry specifies what addresses the remote network will be able to communicate with]
- Remote Policy - Type the IP and mask for the remote network [the entry specifies what addresses the local network will be able to communicate with on the remote location]
- Click Next to continue
A summary of the setup will show on the following screen. Copy the text in the "Configuration for Secure Gateway" box and paste it on a text editor (Notepad, Notepad++, TextEdit, etc.). Save the text file with a ZYSH extension (example: Script_From_Branch_Office.zysh), this file will be uploaded on the remote appliance to configure the VPN. Click Save to complete the VPN wizard.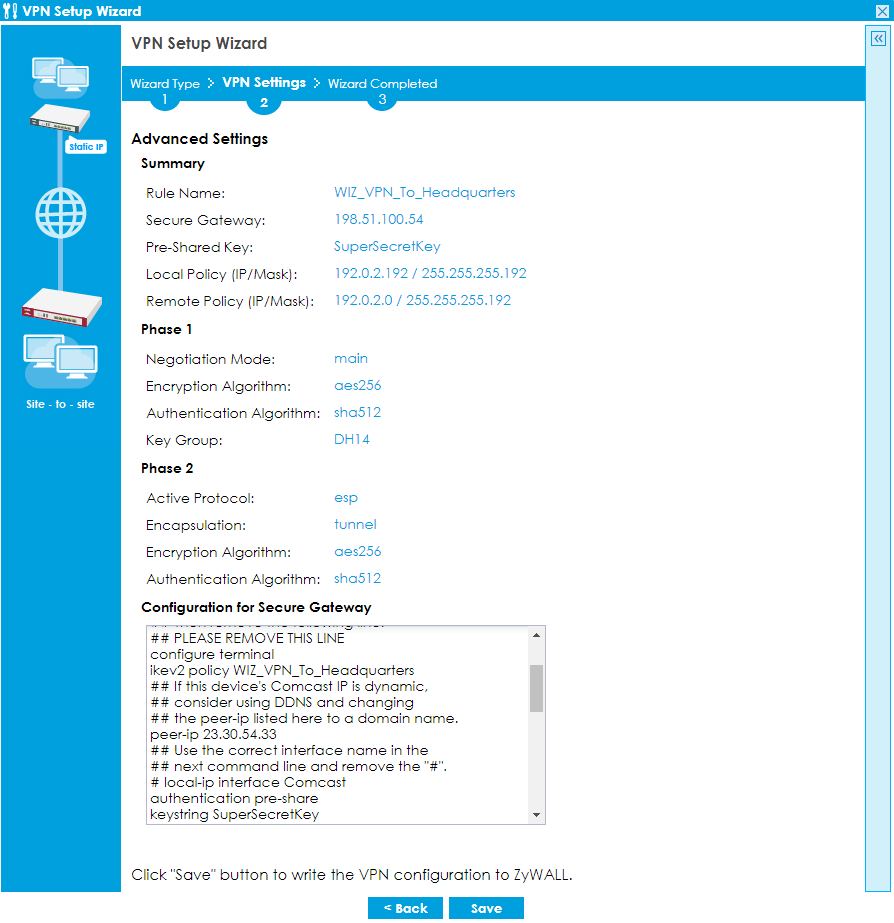
Click Close to end the wizard configuration.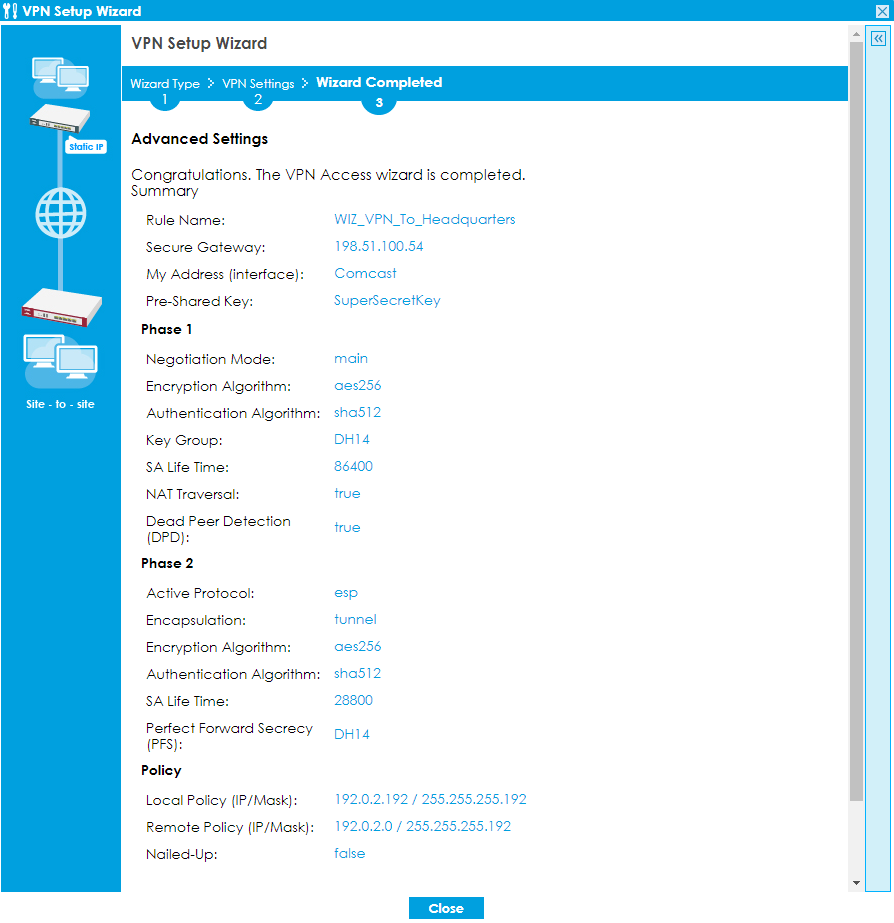
Remote Appliance Setup
Login to the USG WebUI and go to menu, Maintenance(![]() ) → File Manager and click on the Shell Script tab. Click the Browse button to search for the "Script_From_Branch_Office.zysh" file and Upload it.
) → File Manager and click on the Shell Script tab. Click the Browse button to search for the "Script_From_Branch_Office.zysh" file and Upload it.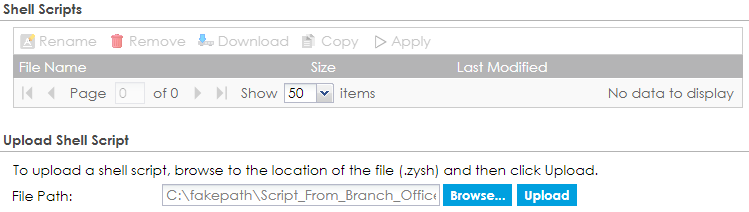
Once the script is uploaded to the remote VPN appliance, Apply it. This will create the matching VPN rule (on remote VPN router) based on the settings selected through the VPN wizard on the primary appliance.
Select Yes to continue with the script loading.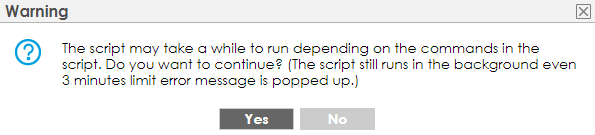
Establish connection
Both ATP/VPN devices are now configured. The only thing left, is to establish the VPN connection. This can be done manually by selecting your VPN connection and clicking the Connect button in Configuration(![]() ) → VPN → IPSec VPN → VPN Connection. Alternatively you can edit the VPN Connection rule, click "Show Advanced Settings" and enable Nailed-Up. With Nailed-Up enabled the VPN tunnel will connect up automatically when the ATP/VPN boots up.
) → VPN → IPSec VPN → VPN Connection. Alternatively you can edit the VPN Connection rule, click "Show Advanced Settings" and enable Nailed-Up. With Nailed-Up enabled the VPN tunnel will connect up automatically when the ATP/VPN boots up.
All devices at the Branch Office will now be able to access devices and computers on the Headquarters subnet and vice versa.
Comments
0 comments
Please sign in to leave a comment.