
This guide provides step-by-step instructions on setting up DNS for system and/or LAN.
Overview
Domain Name Server (DNS) function as a form of phone directory for the internet. They contain a directory of name (domain names) and IP addresses attached to these names. Networking devices, whether it be a computer, smartphone, tablet, router, etc., all communicate with each other using IP addresses. A domain name is much easier for a person to remember, therefore DNS was created, to resolve the domain name to its corresponding IP address, allowing the user access to the data contained by the server hosting the domain.
Supported Devices
ZyWALL 110
ZyWALL 310
ZyWALL 1100
USG40
USG40W
USG60
USG60W
USG110
USG210
USG310
USG1100
USG1900
USG20-VPN
USG20W-VPN
USG2200-VPN
UAG2100
UAG4100
UAG5100
System DNS Setup
To add DNS server entries for the hardware to resolve DNS queries please use the following command:
DNS template:
ip dns server zone-forwarder {append|insert} {domain_zone_name|*} user-defined w.x.y.z {ip_type} [private|interface {interface_name|auto}]
Example: "ip dns server zone-forwarder insert 1 * user-defined 208.67.222.222 interface auto". This command will add server 208.67.222.222 as the first domain zone forwarder entry. This is a public IP address, which means any WAN connection can use, so the interface is set to "auto". If the server entry is for a specific WAN connection, instead of using auto you will need to specify the actual WAN connection this DNS is used with. (Note: For a list of the interface names, enter command "show interface-name")
To enter the commands, you can use SSH/Telnet/Console. Sign in to the command line interpreter using your administrator credentials and do the following:
- Type "configure terminal"

- Create your DNS server entry using the template above.

- Repeat the process (step 2) to add all necessary DNS entries.
- Type "exit" to close the configuration mode.
- Type "write" to force save the configuration file with the changes made via the CLI.
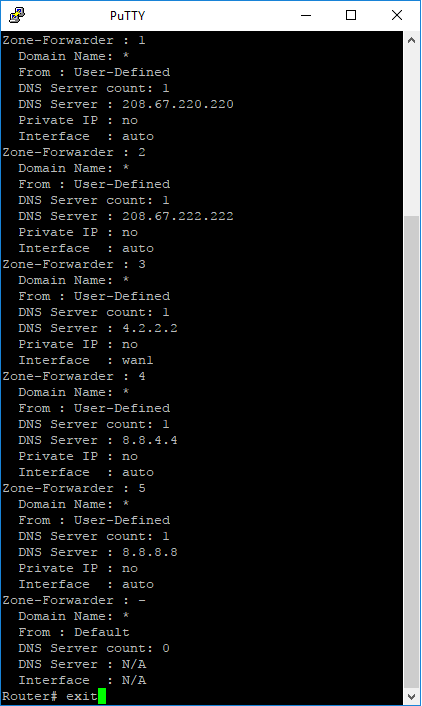
- To view a list of the DNS entries type "show ip dns server database"

- From the router# prompt type "exit" to close the CLI session.
LAN DNS Setup
To add DNS entries for the DHCP server using CLI, first we must find the DHCP pool name for the server. To view the list of DHCP server pool names, use the following command:
show ip dhcp pool
Note: For this example, we will use the LAN2 DHCP pool (LAN2_POOL).
To configure the DNS entries the DHCP server will provide to connected hosts, use the following commands.
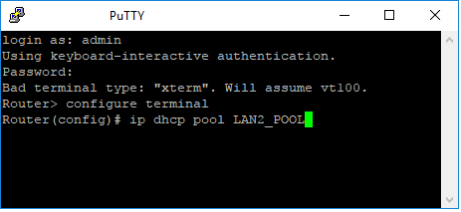
- Type "configure terminal"
- To edit the DHCP pool (LAN2_POOL), enter "ip dhcp pool LAN2_POOL"
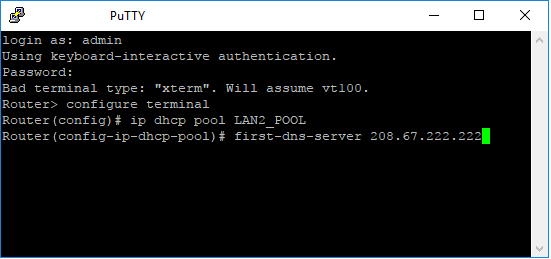
- To enter a DNS entry for a preferred server, use the following command: first-dns-server <ip address>
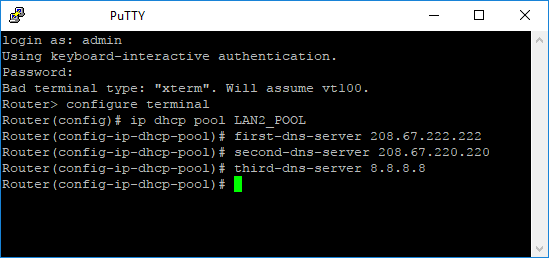
- To enter a second and/or third DNS entry use: second-dns-server <ip address>; third-dns-server <ip address>
- Type "exit" to close the DHCP Pool profile
- Type "exit" to close configuration mode
- Type "write" to force the changes to be written to the configuration file
- Type "exit" to close the CLI session
Any device that connects to LAN2 from this point will receive the DNS server entries just added. For any existing clients, renew the IP address settings or reboot the node.
Comments
0 comments
Please sign in to leave a comment.