
Overview
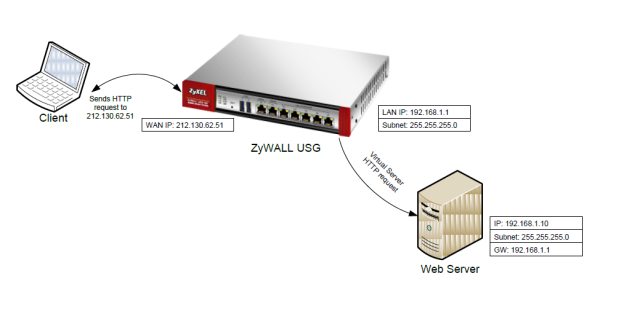
NAT (Network Address Translation – RFC 1631) is the translation of the IP address of a host in a packet. NAT is used to make computers on a private network available to the outside world by using ports to forward packets to the appropriate private IP address.

Supported Devices
ZyWALL 110 – running firmware version 4.20 and newer
ZyWALL 310 – running firmware version 4.20 and newer
ZyWALL 1100 – running firmware version 4.20 and newer
USG40 – running firmware version 4.20 and newer
USG40W – running firmware version 4.20 and newer
USG60 – running firmware version 4.20 and newer
USG60W – running firmware version 4.20 and newer
USG110 – running firmware version 4.20 and newer
USG210 – running firmware version 4.20 and newer
USG310 – running firmware version 4.20 and newer
USG1100 – running firmware version 4.20 and newer
USG1900 – running firmware version 4.20 and newer
Creating Objects
The ZyWALL series routers are object based so objects for port numbers and device IP addresses will need to be created before you do anything else. Most routers allow you to type in the IP addresses and port numbers as you create your rules. The downside to this type of setup is re-configuring the router rules if IP addresses on the devices (computer, NAS, etc.) are changed or if the routers network IP scheme is changed. The user must go through all router menus where rules exist to change the IP setup. The advantage of having an object based router is that if you make a network change all you would need to do is update the object entry, instead of going through each individual menu and updating rules. Once the object is modified it updates all menus where the object is being utilized with the updated information.
Creating Service Object
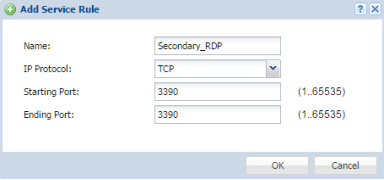
The ZyXEL router is pre-programmed with many service objects out of the box. These are the most commonly used services for port forwarding. You will need to manually enter/create service objects for ports that may not be listed, below is an example for creating a service for port 3390. Go to Configuration → Object → Service and click the Add button to insert the new port object.
- Provide a name for the service object.
- Specify the protocol the port is using (TCP or UDP).
- Type in the start port number and end port number. (if service is for single port number you do not need to specify an end port, this is only needed for port ranges)
- Click OK to create the service.

Repeat the process to create additional port (service) objects.
Creating Service Groups
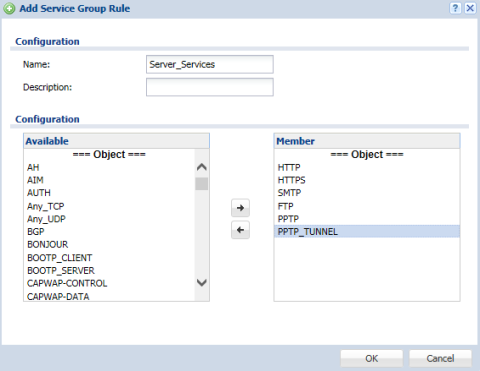
To group different services together please select the Service Group tab within the Configuration → Object → Service menu. Click the Add button to insert a new group.
- Name – Provide a name for the service group.
- Description – Optional.
- Select the available services that will be 'Members' of the group.
- Click OK to create the group.

Creating Address Object
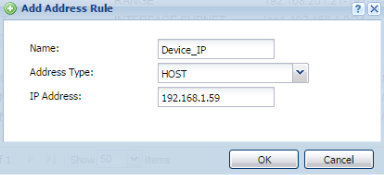
To create an object for the device IP address, go to Configuration → Object → Address. Click the Add button to insert the entry.
- Give the address object a name.
- Because the address object is for a single device IP address, make sure the "Address Type" is set for HOST.
- Provide the IP address of the device.
- Click OK to create the address.

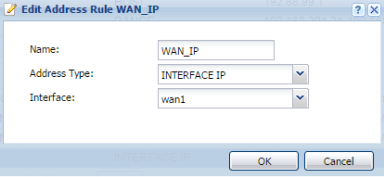
Create an additional address object for the WAN ports IP address.
- Give the address object a name.
- Set the "Address Type" for INTERFACE IP (this will allow the object to pull the address directly from the interface)
- Select the WAN port you want the object to pull the address from.
- Click OK to create the address.

Repeat this process to add any other IP object entry for internal/external addresses.
Create NAT Rule
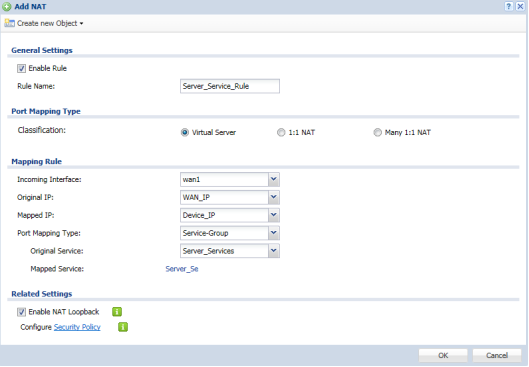
To create the NAT (port forwarding) rule, go to Network → NAT menu, and click the Add button.
- Enable rule.
- Insert a rule name.
- Select Virtual Server for the "Port Mapping Type" classification.
- Choose the incoming internet interface (usually WAN1 or GE1)
- Select the WAN_IP object as "Original IP" option.
- Select Device_IP for the "Mapped IP" option.
- Select Service-Group for the "Port Mapping Type".
- In "Original Service" select the Server_Services (service group).
- Click OK to apply the changes.

Create Policy Control Rule
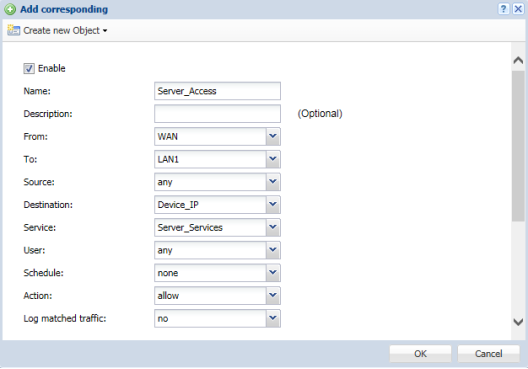
As the final step, we need to create a Policy Control rule to allow traffic to pass through to the server. Go to the Security Policy → Policy Control menu and press the Add button to insert a rule.
- Provide a name to the Policy Control rule.
- Select "FROM" WAN "TO" LAN1.
- Insert your servers IP-address object as "Destination".
- Select your preferred Service or Service Group object under the "Service" option.
- Set "Access" as Allow.
- Enable "Log" if needed.
- Click OK to apply the rule.

Comments
0 comments
Please sign in to leave a comment.