

Step 1: Click on the Apple icon in the top right corner of the screen. Then select "System Preferences".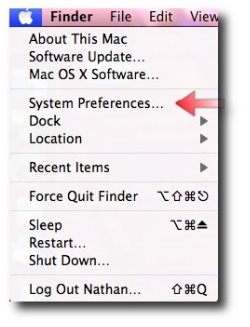
Step 2: Select Network from the System menu.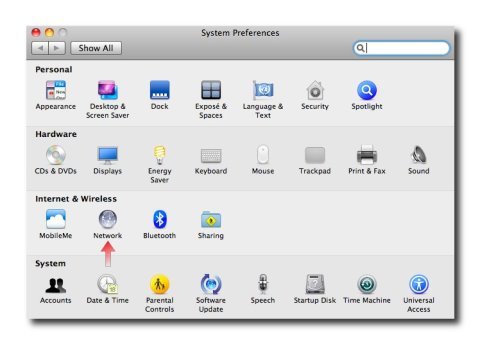
Step 3: In the Network menu, click the "+" sign at the bottom left corner of the page.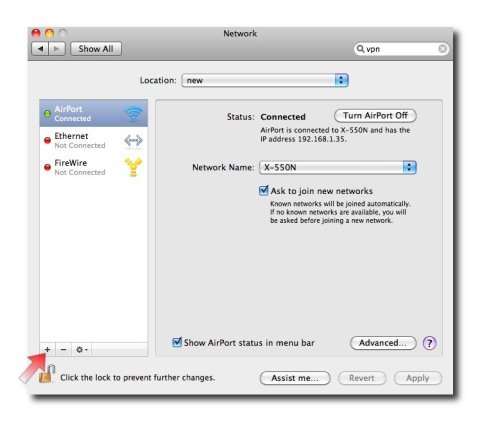
Step 4: Click on "Interface" and select "VPN".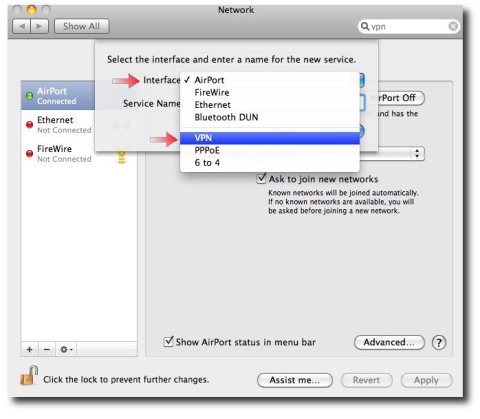
Step 5: Select your VPN Type as "L2TP over IPSec" and set the name of the VPN in the "Service Name". Then click "Create".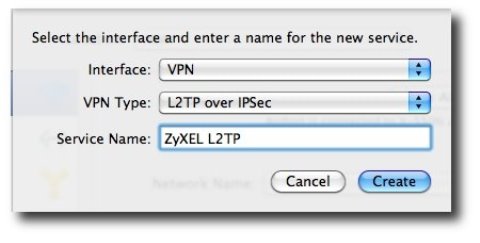
Step 6: Select your VPN Service Name from the panel on the left side and enter your "Server Address" (Public IP address of your firewall), "Account Name" (the Username set on the firewall), then click "Authentication Settings"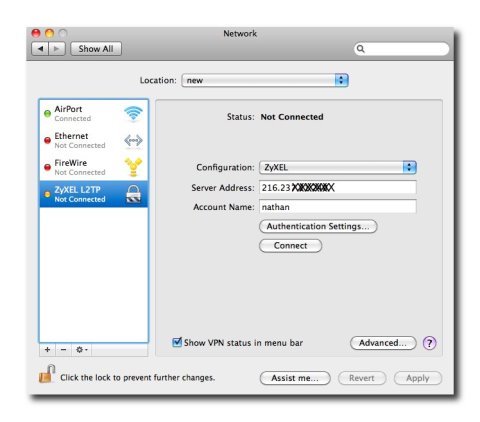
Step 7: Set your "User Authentication Password" (The User Password on the firewall), and your "Machine Authentication Shared Secret" (The Pre-Shared Key on the VPN Gateway settings of the firewall). Then click OK, and click Apply on the main screen.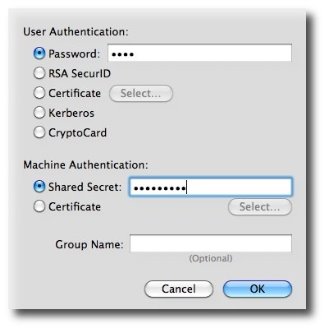
Step 8: Now you should be able to click "Connect" and have it connect to your L2TP connection. You should see a VPN connection icon at the top of the window; from there you can start and stop your saved connection. To make sure that Mac uses the L2TP connection to pass traffic you will need to change the service order by clicking the gear icon on the bottom of the network list and selecting the "Set Service Order" option to make the L2TP connection primary.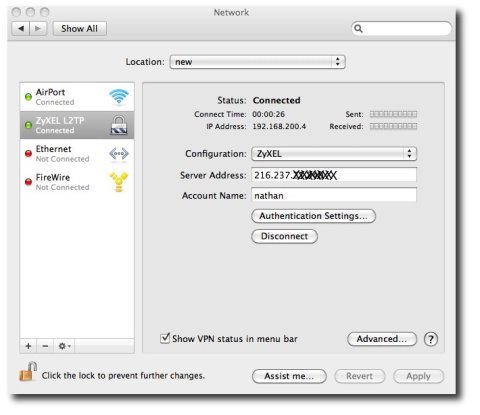
Comments
0 comments
Please sign in to leave a comment.