Overview
The SecuExtender client is a tool used to establish an SSL VPN connection between a client PC and a Zyxel security appliance. Once connected the user has access over the security appliance local network or can send all traffic, including internet, through the tunnel (depending on SSL VPN rule setup).
Supported Devices
ZyWALL 110 – Running firmware version 4.20 and newer
ZyWALL 310 – Running firmware version 4.20 and newer
ZyWALL 1100 – Running firmware version 4.20 and newer
USG40 – Running firmware version 4.20 and newer
USG40W – Running firmware version 4.20 and newer
USG60 – Running firmware version 4.20 and newer
USG60W – Running firmware version 4.20 and newer
USG110 – Running firmware version 4.20 and newer
USG210 – Running firmware version 4.20 and newer
USG310 – Running firmware version 4.20 and newer
USG1100 – Running firmware version 4.20 and newer
USG1900 – Running firmware version 4.20 and newer
USG20-VPN – Running firmware version 4.16 and newer
USG20W-VPN – Running firmware version 4.16 and newer
USG2200-VPN - Running firmware version 4.20 and newer
SSL VPN Rule
SSL VPN allows remote users to establish a VPN connection to the ZyWALL firewall router. A VPN can provide access to resources on the ZyWALL firewall routers local network or allow you to tunnel your internet traffic from hotspot/public networks to protect your traffic from potential man-in-the-middle discovery. Creating an SSL VPN rule gives you the ability to establish an SSL VPN tunnel as well as provide privileges to allowed users, computers and/or resources.
Step 1 – User Account Setup
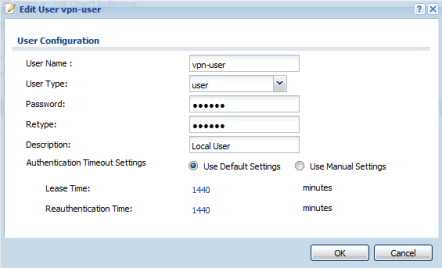
Login to the Zyxel router and go to menu, Configuration → Object → User/Group. Click the Add button to insert user accounts for SSL VPN access. SSL VPN users CANNOT be administrator account "User Type".
Step 2 – User Group Setup
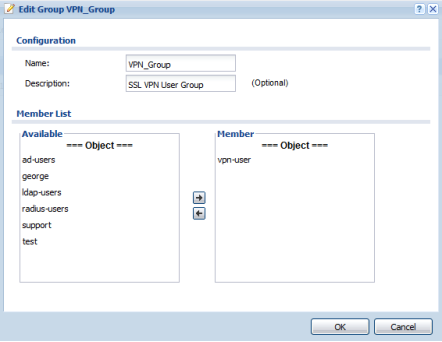
If you have created multiple user accounts you may want to group them all together to keep all settings as simple as possible. You may skip this step if you only have about three user accounts. To create a user group, click the "User Group" tab in the Configuration → Object → User/Group menu. Add all the users which will have SSL VPN privilege to the group.
Step 3 – SSL VPN Address Pool
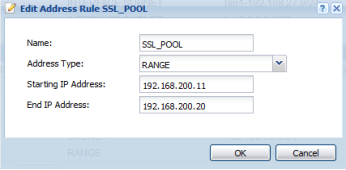
Create an address object for a pool of IP addresses which will be used by the connected SSL VPN user. Go to Configuration → Object → Address and click the Add button to insert the SSL VPN IP address pool. By default 192.168.200.x IP scheme is reserved for SSL VPN connections.
Step 4 – SSL VPN Policy
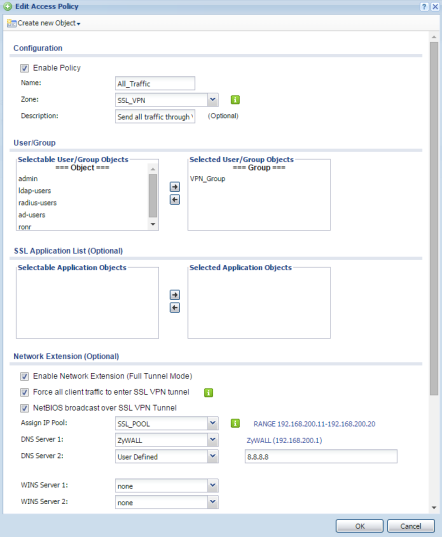
Now that the VPN users and IP pool have been created we can begin creating the SSL VPN policy. Go to menu Configuration → VPN → SSL VPN and click the Add button to insert an SSL VPN policy to allow the specified users access to the network.
- Make sure the "Enable Policy" checkbox is checked
- Provide a name for the SSL VPN policy
- The rule must be part of the SSL_VPN zone
- From the "Selectable User/Group Objects" find the user account or user group and move it over to the "Selected User/Group Objects"
- Scroll down to the "Network Extension" option and check the box to "Enable Network Extension (Full Tunnel Mode)"
- Check the box to "Force all client traffic to enter SSL VPN tunnel"
- For the "Assign IP Pool" dropdown select the object you have created for the SSL VPN IP Pool
- Provide DNS server entries, "User Defined" can be selected to manually enter the DNS server the SSL VPN users will use for their DNS queries, "ZyWALL" can be selected to have the SSL VPN users point all DNS queries to the Zyxel router
- Click the OK button to apply the settings
Installing SecuExtender
Please download the latest SecuExtender client version for Windows OS or macOS and install on a compatible platform.
Windows SecuExtender Client
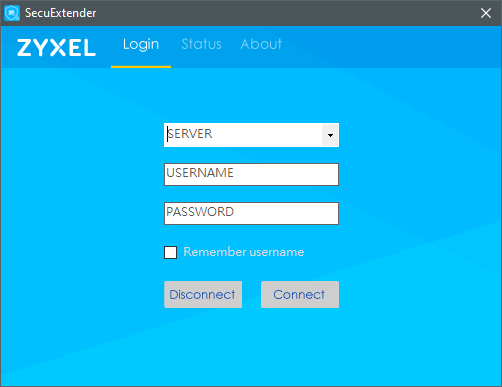
Launch the SecuExtender client to establish an SSL VPN connection to a compatible Zyxel appliance. Provide the following info to initiate the connection.
- SERVER – Provide the domain name, ddns hostname or public IP address of the Zyxel appliance you wish to establish a connection with. (if the management port has been changed from TCP:443, please specify the new SSL port by adding a ":" <colon> and the port number. Ex: <Public_IP>:8443)
- USERNAME – Provide an allowed user account
- PASSWORD – Provide the password for the allowed user account
- Remember username – Check the box to store connection server and credentials on client memory
- Disconnect – Press the Disconnect button to end the SSL VPN session
- Connect – Press the Connect button to initiate an SSL VPN session
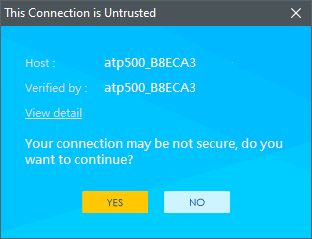
The pop-up below appears when establishing a connection. Verify the certificate being used to encrypt the SSL VPN connection is correct and click YES to trust the connection.
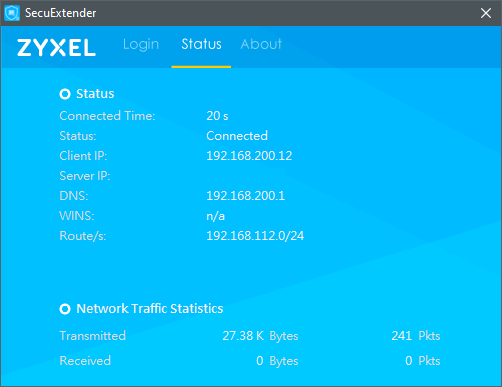
The clients Status tab shows information regarding the connection such as amount of time connected, IP address provided by the Zyxel appliance to the client and traffic statistics.
Right-Click on any of the SecuExtender tab windows for options to disconnect, suspend, resume and quit the client.
- Disconnect – Ends the SSL VPN session
- Suspend – Stops routing traffic through the SSL VPN, session is still active
- Resume – Resume sending traffic through SSL VPN from suspend mode
- Quit SecuExtender – Disconnects the SSL VPN session and stops all client components

macOS SecuExtender Client
Launch the SecuExtender client from you Applications folder. Once launched the client icon will appear on the status bar (top right).
![]()
Click on the SecuExtender icon and select the Preferences option.
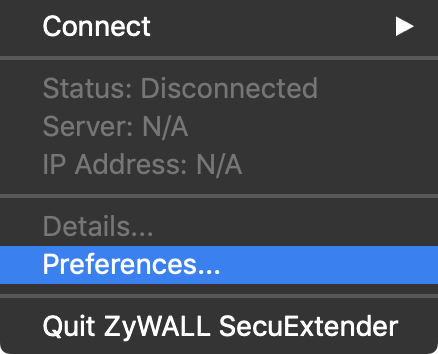
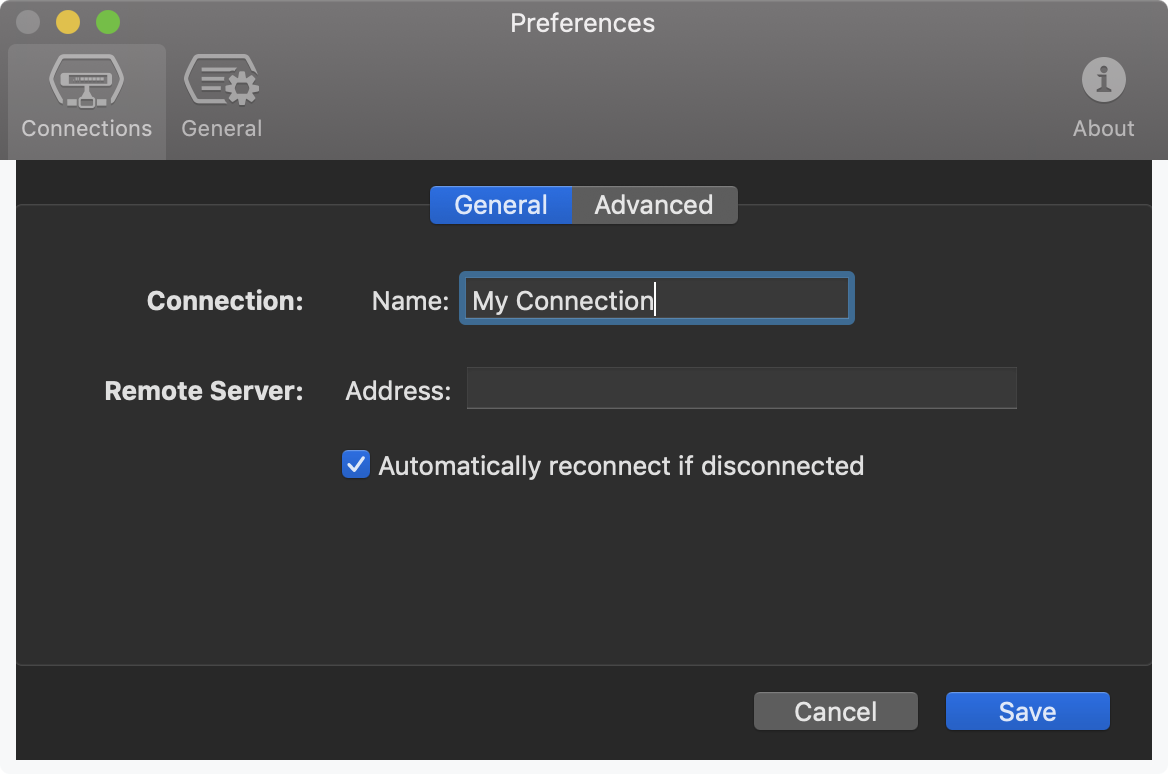
This will open the connections manager. Click the + icon to create a connection profile. 
Provide a Connection Name for the connection and enter the Remote Server Address (IP Address, DDNS hostname or FQDN) colon (:) and port number if different than the default 443. Click the Save button to create the connection profile.
To initiate a connection click the SecuExtender icon on the status bar and select the Connect option.
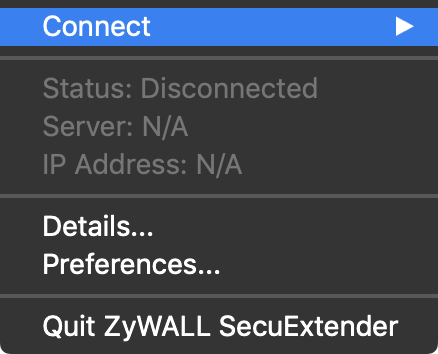
This will display a list of all profiles saved on the SecuExtender client. Select the profile you wish to connect.
![]()
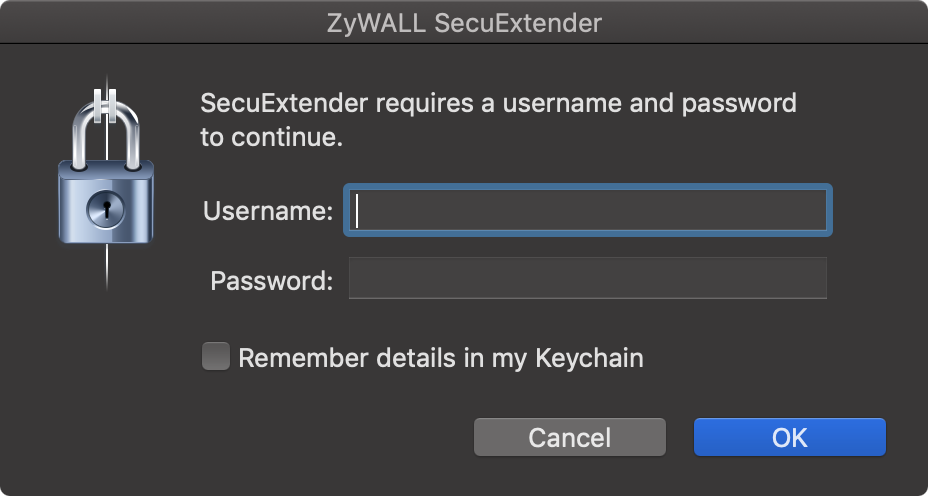
Once the connection initiates and the SecuExtender client establishes a link with the ZyWALL/USG, a prompt will appear asking for VPN user credentials. Type in the account username and password and click the OK button.
If you are using the default self-signed certificate, or the Remote Server Address entry you used does not match the certificate CN (Common Name), an cert error will appear asking to accept the risk and Continue the connection or Cancel. Selecting cancel will disconnect the tunnel.

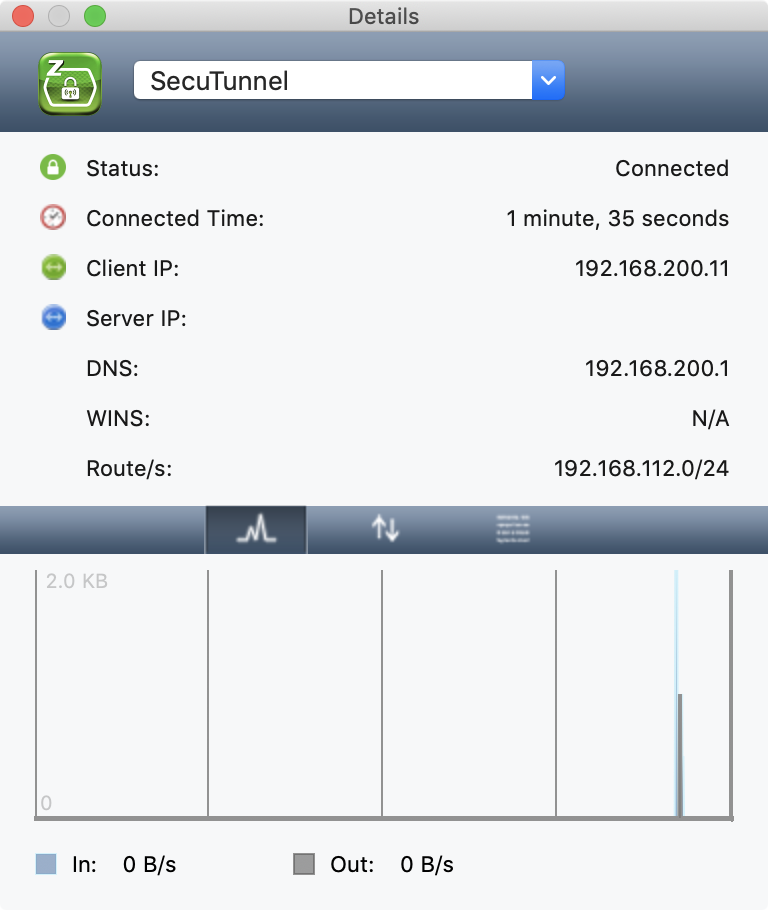
Once authenticated and the connection is fully established you can click the SecuExtender icon on the status bar to look at some details of the connection.
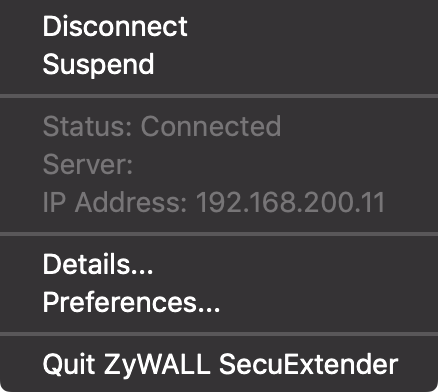
Or click on the Details option for more detailed connection info.
To disconnect the tunnel click on the SecuExtender icon on the status bar and select the Disconnect option.

To close the SecuExtender application selec Quit ZyWALL SecuExtender.
Comments
0 comments
Please sign in to leave a comment.