Overview
There may be different reasons why this would be done, IP conflict being among the highest (especially with VPN users). Using devices with static IP addresses on a different network subnet would be another reason to change the IP settings on the VMG device. It is easier to change the IP on the VMG than it would be to make necessary changes on multiple network devices with static IP addresses assigned.
Supported Devices
VMG1312-B10A
VMG1312-B10D
VMG1312-B30A
VMG3925-B10A
VMG3925-B10B
VMG3926-B10A
VMG4325-B10A
VMG4380-B10A
VMG4825-B10A
VMG5313-B10A
VMG5313-B30A
VMG8324-B10A
VMG8324-B30A
VMG8924-B10A
VMG8924-B30A
VMG9823-B10A
Accessing the Web Configurator
To access the device web configuration screen to configure the modem/router, please connect your computer directly to an available LAN port. A wired computer is needed to minimize downtime when making changes to the configuration. During the configuration process the device may reboot to apply changes successfully, this means a temporary loss of connection to the network, this is why it is not recommended to make any configuration changes via wireless.
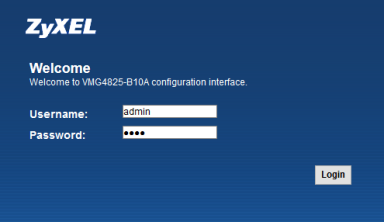
Open an internet browser (Internet Explorer, Mozilla Firefox, Google Chrome, etc.) and delete the contents of the address bar. Type http://192.168.1.1 on the address bar and hit the enter/return key on the keyboard. 192.168.1.1 is the ZyXEL default IP address, if your VMG was provided to you by the internet service provider it may be running proprietary firmware/software based on your provider's standards for operation. If this is the case you may need to contact the service provider to obtain the IP address for the web configurator and login credentials (administrative credentials). Once the correct web configurator address is entered on the browser, the following screen will appear requesting the administrator credentials.
Enter the ZyXEL administrative credentials: username=admin & password=1234
Or, enter the ISP proprietary administrator credentials: must be obtained from the ISP
After the ZyXEL default credentials are entered a prompt will appear to create a new admin password. Create a new password the press the Apply button to save the settings, or, check the box "No need to change password. Do not show this page next time" and click Apply to keep the default password.
LAN Setup
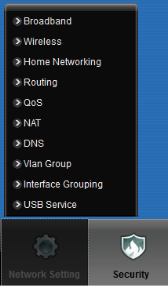
To make changes to the VMG LAN IP, subnet mask or DHCP settings please mouse over the Network Setting menu and select the "Home Networking" option.
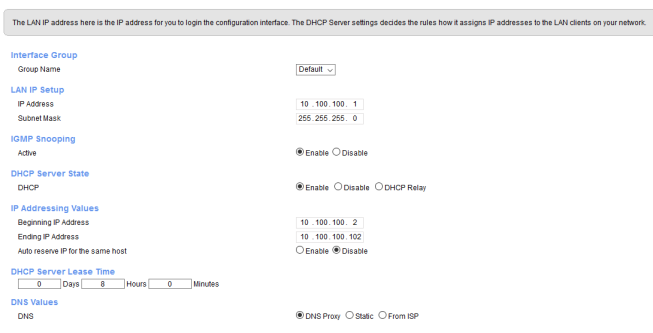
To change the IP setup:
- IP Address – Enter the desired private IP scheme (private IP address schemes include 10.0.0.0/8, 172.16.0.0/12 and 192.168.0.0/16)
- Subnet Mask – The address mask can limit or extend the amount of IP addresses available on the network. A subnet mask of 255.255.255.0 allows for 254 usable IP addresses.
- DHCP Server State – DHCP server capabilities can be "disabled" it you have another device on the network acting as the DHCP server. You can also specify the IP address of the DHCP server under the "DHCP relay" setting.
- Beginning IP Address – First IP address the DHCP server will hand out.
- Ending IP Address – Last IP address the DHCP server can hand out.
- DNS – By default the VMG acts as a proxy for DNS queries. Clients connected to the network will send DNS queries to the VMG and the VMG will forward to external DNS servers. Preferred DNS servers can be entered manually by selecting the "static" option, two DNS server entry fields will appear. Selecting from ISP will push the DNS server settings provided by the internet service provider.
- Click Apply to save the settings.

Comments
0 comments
Please sign in to leave a comment.