
This article covers the setup of VPN tunnels for router-to-router communications using certificates for authentication.
Overview
A VPN (Virtual Private Network) provides a secure communication between sites without the expense of leased lines. VPNs are used to transport traffic over the Internet of any insecure network that uses TCP/IP communications. A Site-to-Site VPN (router-to-router) allows multiple sites to network their resources together into one network.
Supported Devices
ATP200 – Firmware version 4.32(ABFW.0) and newer
ATP500 – Firmware version 4.32(ABFU.0) and newer
ATP800 – Firmware version 4.32(ABIQ.1) and newer
VPN50 – Firmware version 4.30(ABHL.0) and newer
VPN100 – Firmware version 4.30(ABFV.0) and newer
VPN300 – Firmware version 4.30(ABFC.0) and newer
USG FLEX 100
USG FLEX 100W
UGS FLEX 200
USG FLEX 500
USG FLEX 700
Scenario
Main Site
WAN IP: 203.0.113.100
LAN IP: 192.168.1.0/24
Branch Site
WAN IP: 198.51.100.23
LAN IP: 192.0.2.0/24
Create iKEIntermediate Certificate
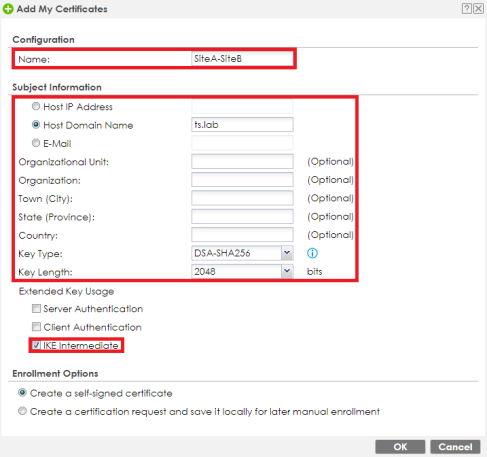
ZyXEL VPN appliances use iKEIntermediate certificates to authenticate VPN connections. Do not use Server or CA certificates to authenticate a VPN connection. To create a VPN/IKE certificate on the ZyXEL appliance go to menu, Configuration→Object→Certificate. Under the My Certificates tab click the Add button to create a certificate.
Fill in the following info:
- Configuration – Provide a name for the certificate.
- Subject Information – Info needed to create certificate.
- Extended Key Usage – Select "IKE Intermediate".
- Enrollment Options – By default "Create a self-signed certificate" should be selected, select this option if not auto-selected.
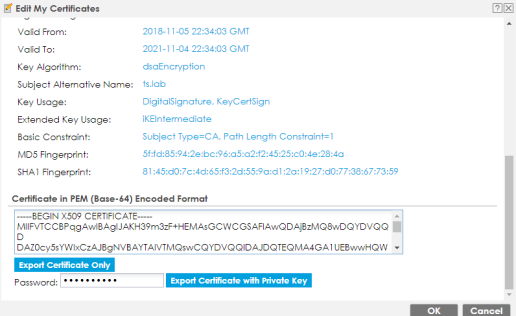
- Once the certificate is created, open and "Export Certificate with Private Key".
VPN Setup Phase 1 (Main)
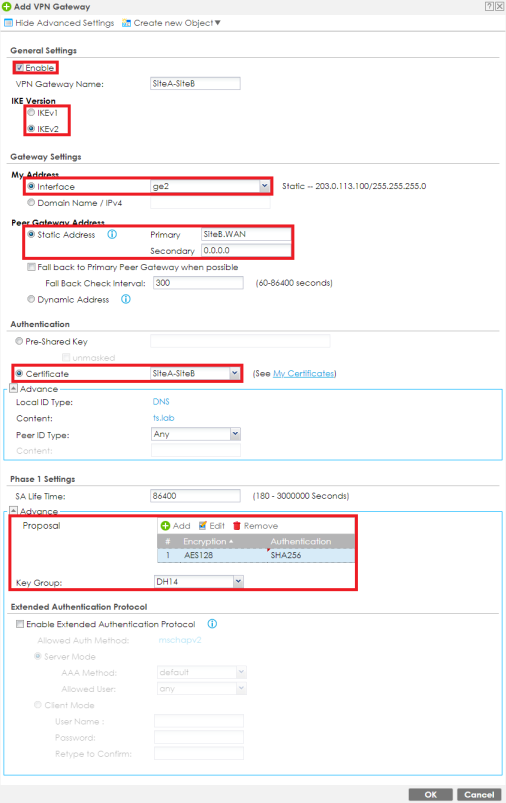
On the main VPN site, please go to menu Configuration→VPN→IPSec VPN and click the VPN Gateway tab. Click the Add button to insert a Phase 1 entry for the VPN tunnel.
Configure the following settings:
- Enable the entry and provide a name for the VPN connection.
- Select the IKE version you wish to use.
- Under "My Address" select the WAN connection the router will use to establish the VPN.
- For "Peer Gateway Address" type in the remote sites public IP address or DDNS hostname.
- For the "Authentication" option, select Certificate and choose the iKEIntermediate cert that was created.
- Specify the connection proposal algorithms and key group.
- Click the OK button to add the rule.
VPN Setup Phase 2 (Main)
To configure the phase 2 portion of the VPN tunnel please click on the VPN Connection tab. Click the Add button to create the phase 2 connection rule.
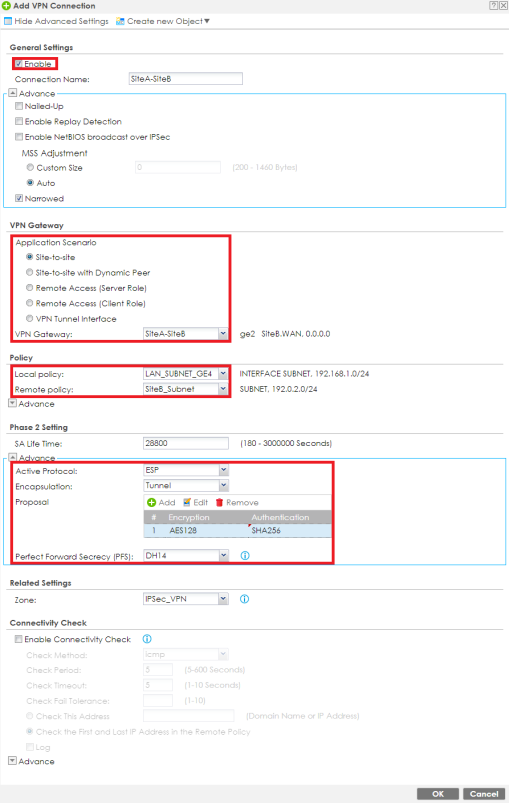
Configure the following settings:
- Enable the entry and provide a name for the connection.
- Select "Site-to-Site" from the Application Scenarios.
- For the VPN Gateway dropdown select the Phase 1 rule that was created on the previous steps.
- Under "Policy", click the dropdown and select an address object.
- Local Policy – The local policy specifies the IP addresses on the local router that you will be giving access to over the VPN.
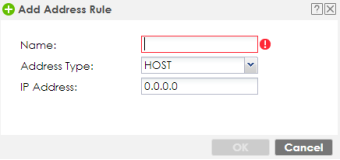
- Remote Policy – The remote policy specifies the remote router IP addresses that will be sharing access with. You may need to create the address object for the remote network first. To do this select the "Create New Object" option and select the IPv4 Address option.

- Specify the connection proposal algorithms and PFS.
- Click the OK button to add the rule.
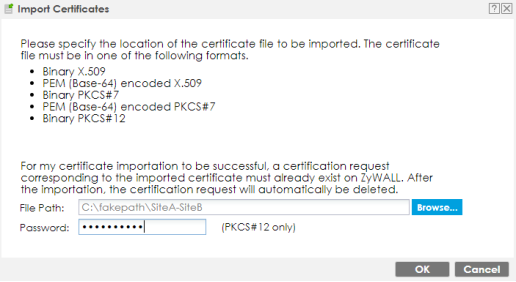
Import Certificate to Remote Site
Login to the branch office router and import the iKEIntermediate certificate to "My Certificates". This is done from menu Configuration→Object→Certificate.
Branch Office VPN Setup
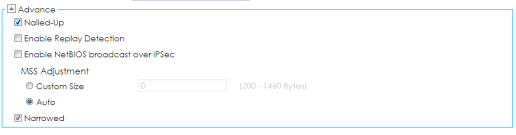
Configure the branch office router to match the VPN configuration done at the main office. Once the configuration has been completed you must decide which site will need to keep the connection active. The site that gets the "Nailed-up" feature enabled is responsible for initiating the VPN connection and reconnecting the tunnel if it is to drop.
To enable the keep alive feature (Nailed-up) for the VPN tunnel, edit the "VPN Connection" setup (phase 2) and click the "Show Advanced Settings" option at the top of the window. Check the Nailed-Up option and click the OK button at the bottom to save the settings.

Comments
0 comments
Please sign in to leave a comment.