
Overview
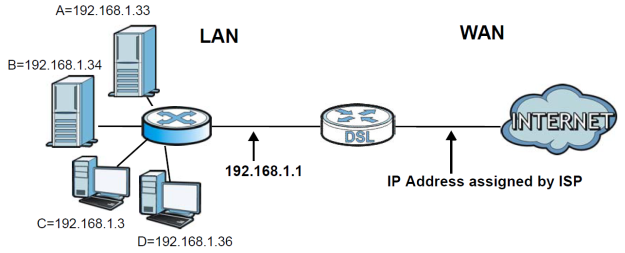
NAT (Network Address Translation) is the translation of the IP address of a host in a packet. Use port forwarding to make computers on a private network behind the ZyXEL router available outside the private network. If the router has only one public IP address, you can make the computers in the private network available by using ports to forward packets to the appropriate private IP address. Below is a step-by-step list of instructions on creating port forwarding rules on the EMG appliances.
Supported Devices
EMG1302-R10A
EMG2306-R10A
EMG2926-Q10A
EMG3425-Q10A
NAT Setup
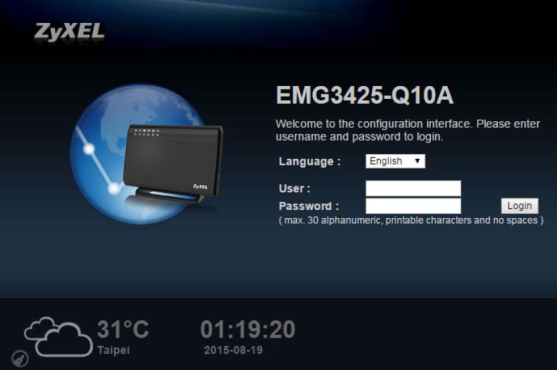
Access your router's web configuration screen by opening a web browser (Internet Explorer, Firefox, etc.) and enter your router's configuration address on the address bar (http://<EMG_IP_Address>). Enter the administrator credentials when prompted and login. Default ZyXEL credentials are admin/1234, this information may be different if device is running custom ISP (Internet Service Provider) settings.
From the status page click on the Configuration menu icon on the far left. 
From the configuration menu select Network→NAT and click the Port Forwarding tab. This menu is where rules can be created to allow traffic into the network.
Example: Hosting a web server in your local network.
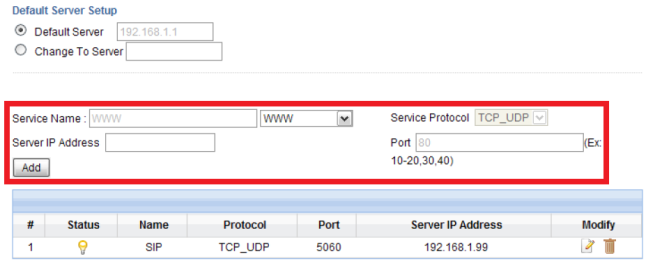
By default web traffic functions on port TCP:80. To create a rule on the ZyXEL router to allow port 80 traffic to the internal web server, click the Service Name drop-down list and select WWW. Selecting this predefined service will automatically populate the correct ‘Port’ number (80) and ‘Service Protocol’ (TCP), all that is left is to specify the ‘Server IP Address’ (IP address of internal device hosting the web server).
The ZyXEL device is pre-configured with the most commonly used services for port forwarding. If the desired service is not listed a custom service rule can be created by selecting “User Define” from the drop-down list. This option will allow the user to manually enter the following:
- Service Name – Provide a name for the custom service (ex: XboxLive)
- Service Protocol – Select the transport layer protocol supported by the server. Options include TCP, UDP or TCP/UDP.
- Port – This is the number of an individual port forwarding entry.
- Server IP Address – Enter the IP address of the internal server the port traffic needs to be redirected to.
- Click Add to insert the rule into the port forwarding summary table.
- Repeat the process to insert additional port forward entries.
Testing and Troubleshooting
To test if the ports are open you can visit a website with a port scanning tool to test the ports you have opened. Such sites include:
http://www.whatsmyip.org/port-scanner/
http://www.t1shopper.com/tools/port-scan/
http://mxtoolbox.com/PortScan.aspx
Please note that port scanning only works on TCP ports as this protocol requires a handshake to verify whether it is open or closed/stealth.
If the services being hosted are common services such as port 80 (WWW), 21 (FTP) or 3389 (RDP), you can use a web browser and/or the Remote Desktop Connection application built into Windows to test.
If the test fails:
- Check the software/firmware version currently running on the router against our FTP server. Make sure the current software/firmware version is installed.
- Reboot the router by pressing the power button found on the rear panel of the appliance. Wait 15-30 seconds before powering back ON.
- Verify the port forwarding rules to make sure the correct port, protocol and server IP address are being used.
- Is the service accessible locally? If you cannot access the service locally, it will not work from the internet either. Test the service(s) locally (internal network) to make sure the server is replying to the traffic.
- Disable the firewall on the computer/device that is running the service(s) to make sure it is not blocking the traffic.
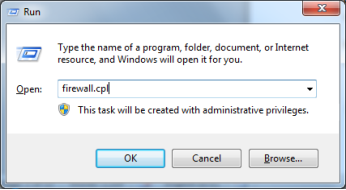
- Windows: To disable the Windows firewall, open a RUN dialog box. You can access this by pressing the Windows + R keys on the keyboard.

- Type “firewall.cpl” and click OK or hit the Enter/Return key.
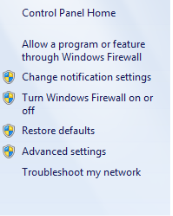
- Select the option to “Turn Windows Firewall on or off” on the left. Disable the firewall by selecting the “Turn off Windows Firewall” and click the OK button to save the settings.
Note: If you’re using a third party software firewall, Trend Micro, Norton, McAfee, etc., please open the softwares control panel and disable the firewall feature. - Mac OS X: To disable the firewall on Mac OS X open System Preferences→Security & Privacy, click the Firewall tab and press the “Turn Off Firewall” button to disable.

- Windows: To disable the Windows firewall, open a RUN dialog box. You can access this by pressing the Windows + R keys on the keyboard.
- Make sure the server hosting the service(s) is pointing to the router as the default gateway.
- Bypass any other piece of networking equipment (switches, access points, etc.) and connect the server directly to the router (if possible). This will rule out the devices between the NBG router and server from causing the problem.
- Check with the ISP (Internet Service Provider) to make sure the port(s) are not blocked on the service end. Some residential ISP’s block certain ports, such as port TCP:80, to prevent users from hosting websites on residential internet lines.
- Contact ZyXEL Tech Support for further assistance at 800-978-7222 M-F from 8AM-5PM Pacific Time, or submit an email support request form here.
Comments
0 comments
Please sign in to leave a comment.