This walkthrough describes how to setup the WAP3205/WAP3205 v2 in Universal Repeater Mode.
Overview
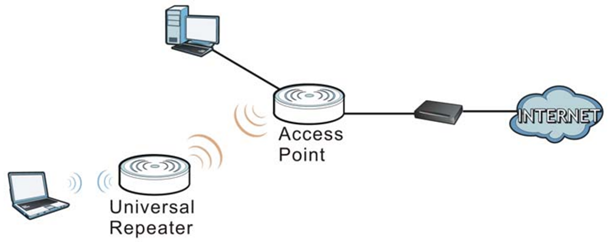
In Universal Repeater Mode, the WAP3205 (v2) can act as an access point and wireless client at the same time. The WAP can connect to an existing network through another access point and also lets wireless clients connect to the network through it. This helps you expand wireless coverage when you have an access point or wireless router already in your network. However, if the main access point uses removable antennas the best (more cost efficient) solution would be to swap the original antennas for high gain antennas. The higher the gain of the antenna the better the coverage area, consult with the manufacturer for specs on the max gain an antenna can have for your product model. If the antennas have already been swapped with high gain antennas or the main wireless base station uses internal antennas, the WAP can be used to cover any areas where Wi-Fi is scarce.
Supported Devices
WAP3205
WAP3205 v2
Table of Content
Initial Setup
Manually Set IP on Windows OS
Manually Set IP on macOS
Configuring the WAP
Troubleshooting
Initial Setup
Start by connecting the power cord to the WAP access point and power the device ON, make sure the toggle switch on the side is set on the wireless mode you wish to use [AP | UR | CL]. Use the provided Ethernet cable to connect a computer directly to the WAP for the initial configuration.
By default the WAP access point has a static IP address configured of 192.168.1.2. In order to access the Web Configurator and configure the settings on the access point the computer needs to be configured with a manual IP address within the range of 192.168.1.3~192.168.1.254.
Click the link below for your computer operating system for instructions on how to manually configure an IP address:
Manually Set IP on Windows OS
Manually Set IP on macOS
Configuring the WAP
- On the back of the WAP3205/WAP3205 v2 press and hold down the reset button for 15 seconds to undo any previous configuration. If you have the WAP3205 v2 make sure the switch is toggled on the "UR" mode before continuing.
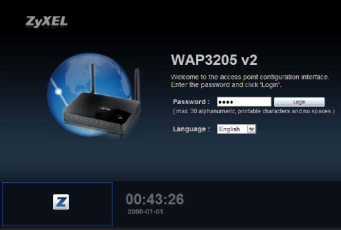
- Open your internet browser and on the address bar type http://192.168.1.2 to open the WAP3205/WAP3205 v2 login screen.
- Default login password is 1234.
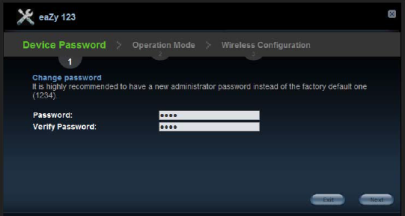
- Once logged into the WAP it will run through the configuration wizard. First screen will ask you to change the default password from 1234 to something else. Type in a new password and hit the "Next" button or ignore changing the password by just hitting the "Next" button.
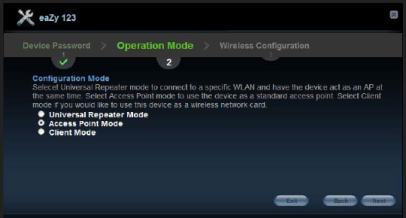
- In the operation mode screen select Universal Repeater Mode if you have the WAP3205. If you have the WAP3205 v2 the toggle should already be set in "UR" from step 1. Hit the "Next" button.
- On the wireless configuration screen you will be presented with a list of all the available Wi-Fi network broadcasts in the range of the WAP. Select your Wi-Fi network and press the "Connect" button.
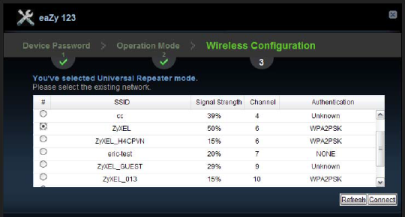
- You will be prompted for the wireless password to your Wi-Fi signal, enter the password/pre-shared key and press the "Next" button.
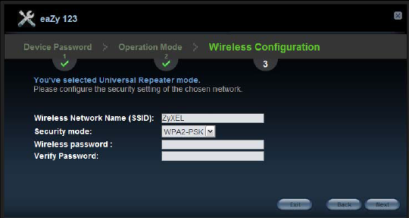
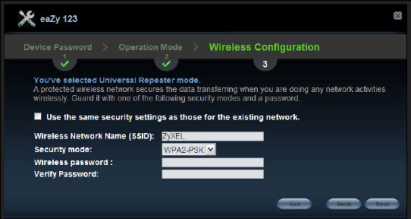
- The next screen will show you the Wi-Fi network name the WAP will broadcast. Make sure the "Use the same security settings as those for the existing network" is checked so that the wireless password is the same as your main routers, but, it is recommended that you change the Wireless Network Name (SSID) to something different for troubleshooting purposes. You do not have to change the SSID (this is not a requirement), but, it is recommended so that this way you know if you are connected to the WAP or to your main routers Wi-Fi signal. Press the "Next" button.
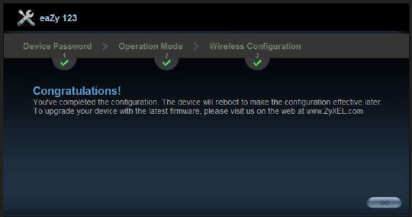
- The wizard setup is now complete. Press the "GO" button to apply the configuration and reboot the WAP3205/WAP3205 v2.
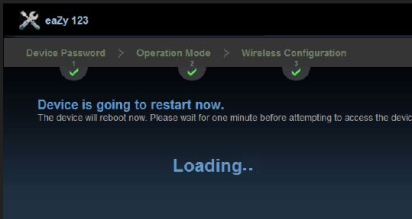
- Once the process is complete your browser will refresh to the Login screen prompting to enter the administrator password again. At this point you can undo steps A, B and C at the beginning of this walkthrough and place the WAP where you need it to expand the wireless signal.
Troubleshooting
- WAP randomly disconnects from the wireless base station.
- If the primary wireless base station has an automatic channel setup option and this is enabled, the router can randomly change the wireless channel it broadcasts the signal on. This option needs to be disabled on the primary wireless base station so it always broadcasts on the same channel.
- Check your primary base station software/firmware version to make sure it is up to date.
- Upgrade the firmware on the WAP if there is an available firmware patch.
- WAP will not establish a link to the primary wireless base station.
- Check the primary wireless station to verify that if using wireless security that it is using WPA2 (AES). The WAP used IEEE802.11n wireless technology which does not support lower end wireless security types [WEP or WPA (TKIP)].
- If your wireless base station is using older wireless standards changing the wireless mode on the WAP to use older standards (IEEE802.11b/g) can improve the chance of a link establishing.
- Make sure the SSID (network name being broadcast by primary base station) does not include any special characters. The WAP cannot communicate with wireless base stations using special characters in the name.
- Verify that the primary base station does not have an automatic channel option enabled. If this is currently enabled please disable this feature.
- Upgrade the firmware on the WAP if there is an available firmware patch.
- Speeds are slow when connecting to the WAP.
- This is a drawback using wireless repeaters in general; throughput is reduced by 50% (half). (traffic has to go from Router → Repeater → Client, instead of just Router → Client). Using a wireless repeater also increases the wireless interference in your environment, this is because the primary base station and the repeater(s) have to work on the same wireless channel, the more devices broadcasting a signal on the same wireless channel the more interference they create between themselves, the slower the performance.
- Unable to access the Internet after installation.
- The repeater may not be configured (initial setup has not been performed).
- Repeater may be out or range from the main wireless signal or signal level is too low. Try different channels and channel bandwidth settings to see which provides better performance at the desired distance (where repeater will be installed).
- Connect to main base station to verify it still has an internet connection (power down repeater to minimize connection confusion).
- Upgrade the firmware on the WAP if there is an available firmware patch.
Comments
0 comments
Please sign in to leave a comment.