

This guide will provide step by step instructions on setting up port forwarding rules on the NBG router and best practices to ensure they always work.
The IP address on the computer/device you will be creating port forwarding rules has to be set so it does not change. If the IP address on the computer/device changes after a reboot of the router or computer/device itself the port forwarding rules will no longer match. The first thing you need to do is manually configure an IP address on the computer/device or set DHCP reservation rules on the NBG router so it always releases the same IP to the computer/device. Setting up the DHCP reservation is the easiest option.
- Make sure your computer is connected via Ethernet cable to one of the four LAN ports on the rear panel of the NBG router.
- Launch your web browser. (Internet Explorer, Firefox, Google Chrome, etc.)
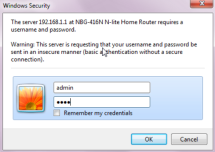
- Type "http://192.168.1.1" on the address bar in your web browser. This is the default LAN IP address of the NBG router.
- Type admin for the user name and 1234 for the password and click OK. (admin/1234 are the default credentials)
Login Screen
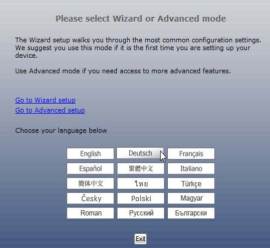
Note: The management session automatically times out when the time period set in the Administrator Inactivity Timer field expires (default five minutes). Simply log back into the NBG-41XN router if this happens. - Select the setup type you want to use. For this example we will click Go to Advanced setup to view and configure all the NBG-41xN's settings.
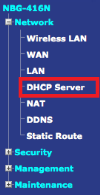
- On the far left click on the Network menu and select DHCP Server.
- If your device has already obtained an IP from the router click on the "Client List" tab and check the box to reserve the address for that device.

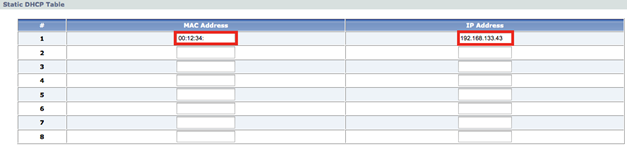
- If your device has not yet been connected to the network and obtained an IP address you can create a reservation from the "Advanced" tab (Network → DHCP Server → Advanced). Enter the device MAC address and IP address you want the router to give it when it is connected.
- To create the port forwarding rules on the router go to Network → NAT → Applications.
- Under the "Add Application Rule" activate the rule and give it a name. Specify the port you wish to open, the port protocol and enter the server IP address (computer/device IP) where the router need to redirect the traffic to. The example below is to open port 80 (TCP) traffic to my computer's IP address.

- Once you have added all your port forwarding entries you will see them listed under the "Applications Rule Summary".

Comments
0 comments
Please sign in to leave a comment.